How Long Do Face Masks Last Unopened

How Long Do Face Masks Last Unopened?

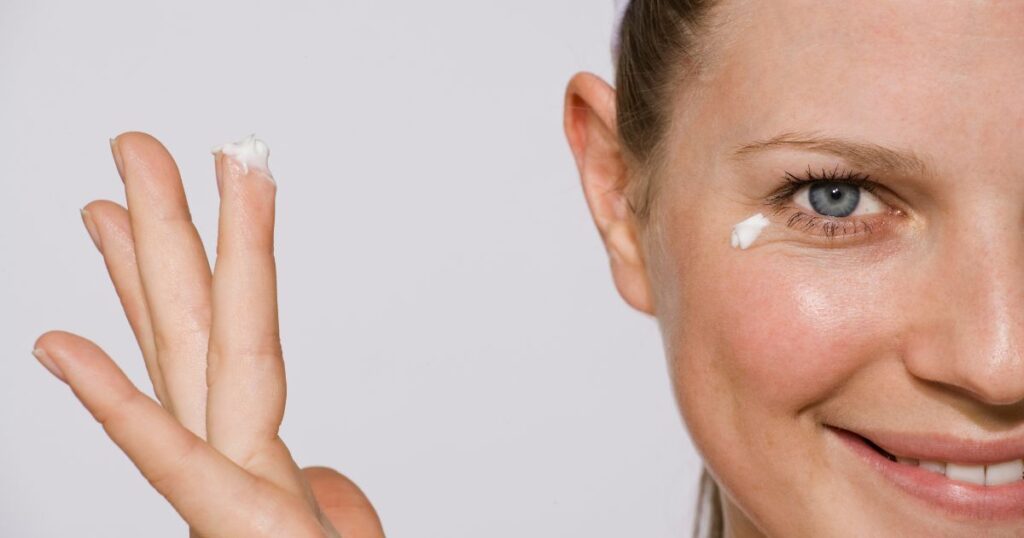
In the realm of skincare, face masks have become an indispensable component of self-care routines. Whether you’re a fan of the elaborate Korean 10-step skincare routine or just a casual user, the question of face mask expiration is crucial for ensuring their efficacy. In this guide, we’ll delve into the lifespan of face masks, the right way to store them, and whether using expired masks is safe. Let’s unravel the mysteries of face mask longevity. Understanding Face Mask Expiration Face masks, like other skincare products, have a shelf life that varies based on ingredients and storage conditions. In general, most face masks last around two years before their effectiveness may start to diminish. It’s essential to be vigilant about expiration dates, which are typically printed on the packaging. Proper Storage for Prolonged Shelf Life To extend the shelf life of face masks, proper storage is key. Keep them in a cool, dark place to prevent degradation of ingredients. Exposure to direct sunlight can lead to a quicker decline in potency. Always check the expiration date and assess the condition of the mask, looking for changes in color, texture, or odor. Using Expired Face Masks: Risks and Considerations Expired face masks, especially those with natural ingredients, may lose their potency faster than chemical-based products. If a mask is past its expiration date, it can potentially cause skin issues like itchiness, rashes, and acne. Trusted experts suggest a “sniff and touch” test for sheet masks; if they pass, they might still be safe to use, but caution is advised. When to Discard Your Face Mask? Cosmetic chemist Mort Westman advises discarding masks that have significantly changed color, odor, or consistency. If a mask exhibits signs of wear, such as fuzzy growth or an altered texture, it’s likely nearing the end of its useful life. Regularly check your sheet masks and store them properly to maintain freshness and potency. Unopened Face Masks: Expiration and Storage Even unopened face masks have an expiration date, typically one year from the date of manufacture. Proper storage is crucial, with cool, dry places like cabinets or drawers being ideal. Remember that the shelf life varies based on the ingredients, and natural masks might expire sooner than chemical-based ones. Korean Face Masks: Manufacturing Dates vs. Expiration Dates Korean face masks often display manufacturing dates instead of expiration dates. This emphasizes freshness, ensuring that products are newly made when they reach consumers. It’s important to differentiate between symbols representing manufacturing and expiration dates, as well as ‘use by’ dates. Safe Use of Expired Sheet Masks While it’s generally considered safe to use expired sheet masks, it’s crucial to ensure they won’t irritate the skin. Perform a sensory check for any bad odors and abnormal consistency. Once opened, sheet masks begin to oxidize, so it’s advisable to use them in one go. If you plan to store an opened mask, transfer the excess serum into an airtight container to prevent oxidation and bacterial growth. Read Also: What Does Face Cleanser Do to the Face? FAQs: Can I use expired sheet masks? It’s generally safe if they pass a sensory check for odors and consistency. Do face masks expire if unopened? Yes, face masks do expire, even if unopened, typically after one year. How long do Korean face masks last? Korean face masks may have a manufacturing date, emphasizing freshness. Shelf life varies by brand. Is it safe to use expired clay masks? Many clay masks with natural ingredients can be used after expiration if stored properly. Conclusion:  As your face masks approach their expiration date, view it as an opportunity for a deep detox session. Spend some quality time pampering your skin, and it will undoubtedly thank you. Face masks are not just skincare; they’re a ritual of self-care that rejuvenates both your skin and spirit. Face Mask Storage Guidelines Type of Mask Storage Guidelines Sheet Masks Store in a cool, dark place; use promptly once opened Unopened Face Masks Keep in a cool, dry environment; discard after one year Korean Face Masks Differentiate between manufacturing and expiration dates Expired Sheet Masks Perform a sensory check for odors and consistency Clay Masks Properly store to maintain freshness and longevity N95 Face Masks Follow CDC guidelines for storage; consider filtration levels

Why Are Eye Creams So Expensive

Why Are Eye Creams So Expensive?

Eye creams have become a sensation in the beauty industry, with claims of being a miraculous solution to eliminate dark circles, wrinkles, and signs of fatigue around the eyes. The rising costs of these creams, some even reaching Rs 25,000 or more, have left many questioning their necessity. In this article, we delve into the factors behind the high price tags, the science behind eye creams, and whether they are truly worth the investment. The Buzz in Beauty Circles: Beauty Experts’ Perspectives: Debunking the Marketing Hype: Understanding Eye Creams: What is Eye Cream? Benefits of Eye Cream: Active Ingredients in Eye Cream: Why is Eye Cream So Expensive? Check the Ingredients List: Is Eye Cream Worth Your Money? Read Also: Do Eye Creams Actually Work? FAQs: Do eye creams work for wrinkles? Yes, eye creams formulated with retinol and peptides are effective for wrinkles. Why can’t you put eye cream on your lids? Heavy and moisturizing eye creams can make eyelids too oily for makeup application. What should I use instead of an eye cream? A gentle, lightweight, and hydrating moisturizer can be used as an alternative to eye cream. Should I use eye cream in my 20s? Starting in the teen years, use a hydrating eye cream, and in your 20s, consider collagen-boosting options. Conclusion: The high cost of eye creams is attributed to the intricate formulation required for the delicate eye area. While some eye creams may justify their price with effective ingredients, alternatives exist for those seeking budget-friendly yet efficient solutions. Understanding the science behind eye creams empowers consumers to make informed choices based on their unique skincare needs. Remember, the true worth of an eye cream lies in its ability to deliver results, not just in its price tag.

Do Eye Creams Actually Work

Do Eye Creams Actually Work? Unveiling the Truth About Eye Creams

In the pursuit of youthful and vibrant skin, many individuals turn to eye creams with high expectations. Promises of reducing fine lines, wrinkles, dark circles, and puffiness surround these skincare products. But are eye creams truly effective, or are they just glorified moisturizers? Let’s delve into the science behind eye creams and explore what they can and cannot do for your skin. The Importance of Eye Creams: Eye creams are not just expensive moisturizers in smaller packages. Dermatologists emphasize that these specialized products are formulated to address the unique needs of the delicate skin around the eyes. The thin and fragile nature of this skin makes it prone to dryness and quicker to show signs of aging and fatigue. What Eye Creams Can Do: Hydration for the Delicate Eye Area: The skin around the eyes lacks oil glands, making it susceptible to dehydration. Hydrating eye creams, containing ingredients like hyaluronic acid, glycerin, ceramides, and fatty acids, play a crucial role in maintaining skin moisture. These components form an inert layer on the skin, preventing water loss and promoting hydration. Reduction of Fine Lines and Wrinkles: Collagen loss with age leads to the appearance of fine lines and wrinkles. Eye creams with peptides, retinol, and vitamin C can stimulate collagen production, improving skin elasticity and reducing the signs of aging. Regular use of these ingredients helps combat the stress caused by constant eye movement. Temporary Reduction of Undereye Puffiness: Caffeine-infused eye creams can temporarily minimize undereye puffiness by constricting blood vessels. Additionally, cold compresses, such as refrigerated tea bags or cucumber slices, can be effective in reducing puffiness. What Eye Creams Can’t Do: Long-Term Solution for Undereye Puffiness: While caffeine in eye creams provides a temporary solution by constricting blood vessels, it doesn’t offer a lasting remedy for undereye puffiness. Cosmetic procedures like peels or lasers are suggested for more permanent results. Complete Elimination of Dark Circles: Eye creams alone cannot completely eliminate dark circles. Tinted moisturizers may help conceal them, but for a more lasting solution, cosmetic procedures performed by dermatologists, such as peels or lasers, are recommended. Making the Most of Eye Creams: To reap the maximum benefits from eye creams, dermatologists advise the following: Read Also: How to Keep Mascara From Smudging? FAQs: Do eye creams work for everyone? Eye creams may work differently for individuals based on their skin type and specific concerns. It’s essential to choose a product tailored to your needs. Can I apply eye cream on the top eyelid? Dermatologists recommend avoiding the top eyelid to prevent potential irritation and discomfort. How often should I use eye cream? Apply eye cream either in the morning or at night, but not both. Follow the instructions on the product for optimal results. Are there age restrictions for using eye creams? While younger individuals may not necessarily need eye creams, those concerned about signs of aging can benefit from incorporating them into their skincare routine. Can eye creams completely eliminate dark circles? Eye creams alone may not eliminate dark circles entirely. For more lasting results, consider cosmetic procedures recommended by dermatologists. Conclusion: Eye creams can be valuable additions to skincare routines, especially for those concerned about fine lines and wrinkles. While they may not provide a miraculous cure, their targeted formulations can effectively hydrate the delicate eye area and reduce visible signs of aging. Understanding their limitations and combining their use with proper skincare practices can help individuals make the most of these specialized products.

How to Contour Your Face

How to Contour Your Face: A Comprehensive Guide for Different Face Shapes

Contouring and highlighting are transformative makeup techniques, but they can be tricky, especially considering the variations based on face shapes and product choices. In this guide, we’ll explore the art of contouring tailored to specific face shapes, offering step-by-step instructions for achieving a defined and highlighted look. Contouring for an Oblong/Oval Face Shape: An oblong face is almost twice as long as it is wide, lacking defined points at the chin, jaw, or hairline. Contour: Along the hairline to create the illusion of a smaller forehead. Below the cheekbones, starting at the ears and ending in the middle of the cheeks. Highlight: Under the eyes in an upside-down triangle shape. Contouring for a Diamond Face Shape: A diamond face has wider cheeks, a narrowing hairline, and chin, often appearing longer than wider. Contour: Below the cheekbones, starting at the ears and ending in the middle of the cheeks. Avoid bringing the contour too close to the mouth. Highlight: Under the eyes in an upside-down triangle shape, aligning with the contoured area. In the middle of the forehead and chin to broaden these narrower regions. Contouring for a Heart Face Shape: A heart face has a narrow, pointed chin, narrower cheeks than the hairline, and may include a widow’s peak. Contour: Along the sides of the forehead and temples to balance the upper and lower halves. On the lower chin to enhance the point. Highlight: Under the eyes in an upside-down triangle shape. In the middle of the forehead and chin to widen these areas. Contouring for a Round Face Shape: A round face has similar length and width with no defined points along the jawline, chin, or forehead. Contour: Around the sides of the forehead and temples to slim down. Below the cheekbones from ear to middle of cheeks, then down to the jawline for added length. Highlight: Under the eyes in an upside-down triangle shape. In the middle of the forehead and chin to add width. Contouring for a Square/Rectangle Face Shape: A square face is roughly the same length and width, with an even hairline and jawline. Contour: Around the sides of the forehead and temples to slim down. Along the hairline to create a smaller forehead. Below the cheekbones, starting at the ears and ending in the middle of the cheeks. Under the jawbone to slim this area. Highlight: Under the eyes in an upside-down triangle shape. In the middle of the forehead and chin. Main Tips for Effective Contouring and Highlighting: Use contour shades to slim and narrow larger areas while defining cheekbones. Utilize highlight shades to bring forward specific areas and brighten the eye region. Read Also: How to Use Texture Powder for Hair? FAQs: How do I choose the right contour shade for my face? Select a contour shade that is a few shades darker than your natural skin tone for a subtle and natural look. Can I use the same contouring technique every day? While the basic principles apply, feel free to adjust the intensity based on the occasion and your personal preferences. Do I need to contour and highlight every part mentioned in the guide? No, you can customize your contouring routine based on your preferences and the areas you want to emphasize or downplay. What tools are essential for effective contouring? A good contour palette, makeup brushes, and a beauty blender are key tools for achieving a seamless contour. Conclusion: Contouring your face according to its shape is an art that enhances your natural beauty. By following these tailored techniques, you can achieve a flawless and highlighted look. Experiment with different shades and practice to find the contouring routine that works best for you.

How to Use Hair Pomade

How to Use Hair Pomade: A Comprehensive Guide for Men

How to Use Hair Pomade? Hair styling is an art, and mastering it requires more than just a quick glance in the mirror. Men often neglect discussing their hair care routines, leaving them oblivious to the world of possibilities offered by styling products. In this comprehensive guide, we’ll focus on one of the most versatile hair styling products for men – pomade. Whether you’re a seasoned user or a novice, this guide will walk you through the steps of using pomade effectively to achieve your desired look. Understanding Hair Pomade: Choose the Right Hold and Shine Pomades come in various formulations, each offering a unique hold and shine. Understanding these two aspects is crucial for selecting the right product for your hair type, length, and style. Here’s a breakdown: Hold: Shine: Step-by-Step Guide to Using Hair Pomade Step 1: Choose Pomade with the Right Hold and Shine Select a pomade that aligns with your hair type, length, and preferred style using the provided chart. Step 2: Use Pomade with Slightly Damp Hair Apply pomade to slightly damp hair for easier distribution and styling. Pat hair gently with a towel after wetting it, avoiding aggressive rubbing. Step 3: Warm It Up in Your Hands Scoop a small amount of pomade and rub it between your palms and fingertips. Warming it up makes it easier to spread through your hair. Step 4: Apply Pomade, Starting at the Hair Roots Work the pomade into the roots first, as this determines the direction your hair sits. Ensure even coverage from the base to the ends. Step 5: Comb Your Hair Use a comb to spread the pomade evenly and style your hair. Avoid over-application; less is more. Add more if needed, repeating steps 3 and 4. Step 6: Dry Your Hair Choose between blow-drying on the cool setting for added hold and volume or air-drying for a natural look. How to Apply Pomade: In-Depth Insights 1. Pick Your Shine Explore the shine options (high, medium-to-high, low-to-medium, or matte) based on your desired look. Recommended pomades include American Crew, Baxter of California, By Vilain, and Blind Barber. 2. Towel-Dry Your Hair (and Leave It Slightly Wet) Pomade works best on towel-dried hair. Ensure your hair is slightly damp, activating the pomade’s properties. 3. Emulsify a Small Amount in Your Hands Experiment with the amount based on your hair length. Warm the pomade in your fingertips for even distribution. 4. Target the Roots First Focus on the roots to define your hairstyle. Warm fingertips allow you to reach the base of the hair shaft effectively. 5. Give It a 360 Application Depending on your style, apply pomade all around your head. Use your fingertips and palms to ensure uniform coverage. 6. Comb It Through Distribute the product evenly by combing through your hair. Avoid excess application, and use a comb for precise styling. 7. The Final Step: Air Dry or Blow Dry Choose between air-drying or blow-drying on the cool setting for added hold and volume. Best Pomade Hairstyles for Men The Pompadour: The Undercut Combover: The Faux Hawk: Read Also: How to Add Volume to Men’s Hair? FAQs: Can I apply pomade to dry hair? While possible, it’s recommended to apply pomade to slightly damp hair for better spreadability and styling. How much pomade should I use? Start with a dime to quarter-sized amount for short to medium-length hair. Adjust based on coverage needs. Can I air-dry my hair after applying pomade? Yes, air-drying is suitable, especially for those with normal to thin hair, enhancing the thickening effect. What’s the difference between matte and high-shine pomades? Matte pomades provide a natural, shine-free finish, while high-shine pomades offer a polished, glossy look. Choose based on your preference. Conclusion: Mastering the art of using pomade is essential for achieving the perfect hairstyle. Experiment with different holds, shines, and styles to discover what suits you best. Remember, less is more, and understanding your hair type is key. Follow this comprehensive guide, and you’ll be on your way to effortlessly stylish hair every day.

How to Add Volume to Men's Hair

How to Add Volume to Men’s Hair?

Achieving voluminous hair is a common desire, and it’s not just something party DJs and hair stylists advocate for. In this guide, we’ll explore the concept of hair volume, factors influencing it, signs of volume loss, and effective ways to add volume to men’s hair. Whether you’re dealing with age-related thinning or simply want fuller, healthier-looking hair, we’ve got you covered. Understanding Hair Volume: What is Hair Volume? When we talk about hair volume, we’re considering various aspects: Factors Influencing Hair Volume: Genetics play a role in hair density and thickness, but external factors can also impact volume. Weather conditions, humidity, oil buildup, and styling products can lead to temporary decreases in hair volume. Signs of Volume Loss: Hair naturally loses volume with age, manifesting as thinner strands, wider part lines, and less substantial ponytails or man buns. Altering Hair Volume with Hairstyles: Can a Haircut or Hairstyle Add Volume? The right haircut can enhance the appearance of volume, even for thinning hair. Growing hair out provides more styling options, allowing for increased volume with the right tools and products. Products for Natural Volume Enhancement: Shampoo and Conditioner: Incorporate an all-natural thickening shampoo and conditioner into your routine to nourish and add volume. Consider using a vitamin-packed hair food treatment for noticeable results. Styling Products: Use hair gel formulated for fine hair to avoid weighing down strands. A texturizing spray with natural ingredients can help create a bigger and fuller look. Maintaining Volume with Proper Hair Care: Washing Hair Correctly: Avoid aggressive washing, opting for a gentle scalp wash. Air-dry or use a blow dryer on the lowest heat setting to maintain healthy hair. Choosing the Right Shampoo and Conditioner: Invest in quality products, such as a volumizing shampoo free of sulfates and a conditioner that replenishes natural oils without adding extra weight. Changing Hairstyle: Elaborate hairstyles may damage hair, leading to breakage and hair loss. Choose hairstyles that enhance volume without causing stress on follicles. Avoiding Damaging Products and Tools: Stay away from hair spray, gel, mousse, and other styling products that can damage and break hair. Also, avoid chemical and heat-based styling tools. Adding Volume with Hair Growth Treatments: Minoxidil: Consider topical minoxidil to benefit hair strands and promote growth. It’s effective in treating various types of hair loss. Finasteride: Oral and topical finasteride can control DHT levels, a hormone associated with male pattern baldness, promoting thicker and healthier hair. Tips for Adding Volume Immediately: Wash and Dry Correctly: Avoid aggressive scrubbing and blow-dry with the lowest heat setting or air-dry. Use the Right Shampoo and Conditioner: Invest in quality products to maintain hair health and volume. Change Up Your Haircut: Choose a hairstyle that enhances volume without causing damage. Avoid Perms, Irons, Styling Products: Steer clear of damaging products and tools that may lead to hair loss. Cranking Up Volume Instantly: Sea Salt Spray: Use a sea salt spray to add incredible volume and texture. Spritz it on as a pre-styler after towel-drying. Hair Putty: Quality hair putty provides a firm yet flexible hold, preventing styled hair from falling flat. Blow-Dry Your Hair: Invest in a good hair dryer and blow-dry in the opposite direction for added volume. Biotin Gummies: Take biotin daily to strengthen hair follicles and promote volume. Get a Haircut: Consider a haircut that reduces weight, contributing to a more voluminous look. Read Also: How to Get Hairspray Out of Hair? FAQs: Can hairstyles really make a difference in adding volume to men’s hair? Yes, the right hairstyle can significantly enhance the appearance of volume, even for thinning hair. Experimenting with different cuts and styles can make a noticeable difference. Are sea salt sprays effective for adding volume? Sea salt sprays are excellent for adding volume and texture. They work by removing moisture from the hair, creating a fuller and more voluminous look. How often should I use hair putty or styling products? Use hair putty or styling products as needed. Overuse of styling products can lead to buildup, affecting the overall health and volume of the hair. Follow product recommendations for optimal results. Is blow-drying harmful to hair? Blow-drying can be harmful if done excessively or at high heat. Use the lowest heat setting and maintain a safe distance from the hair. Air-drying is a gentler alternative. Can biotin gummies really promote hair volume? Biotin is essential for keratin production, promoting healthy and strong hair. Daily intake of biotin can strengthen hair follicles, contributing to increased volume. Conclusion: In the pursuit of voluminous hair, it’s essential to adopt a multi-pronged approach. Experiment with different products, hair care routines, and hairstyles to find what works best for you. Prioritize the health of your hair, protect against hair loss, and avoid gimmicks or harmful chemicals. Remember, achieving the desired volume is a journey, and with the right strategies, you can enjoy a fuller and healthier mane. Tips: Tips Description Wash and Dry Correctly Gentle washing and proper drying methods maintain hair health. Use the Right Shampoo and Conditioner Invest in quality products to nourish and protect hair. Change Up Your Haircut Choose hairstyles that enhance volume without causing damage. Avoid Perms, Irons, Styling Products Steer clear of damaging products and tools that may lead to hair loss. Sea Salt Spray Use as a pre-styler for incredible volume and texture. Hair Putty Provides a firm yet flexible hold, preventing styled hair from falling flat. Blow-Dry Your Hair Use a hair dryer for added volume, blow-drying in the opposite direction. Biotin Gummies Daily supplement for stronger hair follicles and increased volume. Get a Haircut Consider a haircut that reduces weight, contributing to a more voluminous look.

Who Should Wear Brown Mascara

Who Should Wear Brown Mascara?

Brown mascara, often overshadowed by its black counterpart, is making a comeback in the world of beauty. If you’ve been hesitant to explore the world of brown mascara, now is the time to embrace this versatile beauty product. In this comprehensive guide, we’ll delve into the various ways brown mascara can enhance your eye makeup routine, address common questions about its usage, and recommend some top-notch brown mascaras for different eye colors. Let’s dive in! Enhancing Your Look with Brown Mascara To Enhance Bottom Lashes If you’ve been skipping mascara on your lower lashes, consider using a natural-looking brown shade. This subtle choice enhances and opens your eyes without overpowering your makeup look. Try using the tip of a mascara like 2000 Calorie Mascara in Black/Brown for precise application, making your eyes appear bigger. To Brighten Your Eyes Brown mascara isn’t just for no-makeup makeup days; it can brighten your natural eye color. Choose a rich brown shade like Lash Revival Mascara in Black/Brown to make blue and green irises pop or deepen the beauty of brown and hazel eyes. Pair it with eyeshadows from the Masterpiece Nude Eyeshadow Palette for a stunning look. Perfecting a Natural Look On those no-makeup makeup days, swap your classic black mascara for a brown one. Rise & Shine Mascara in Brown, applied in a zig-zag motion, provides instant, natural-looking definition and curl that complements your favorite neutral makeup hues. Making Lashes Appear Naturally Thicker Achieve naturally thicker-looking lashes by applying Masterpiece Max Mascara in Black Brown. Coat the top lashes close to the root, then wait before applying brown mascara underneath, zig-zagging from root to tip. Concentrate on the roots for fuller lashes with a more natural finish. Brown Mascara Questions, Answered Is Brown Mascara Better Than Black? The choice between brown and black mascara depends on personal preference. While black mascara creates a bold contrast, brown mascara offers a softer look. It blends well with natural shades, making it ideal for no-makeup makeup looks and complementing brown eyes or hair. Blondes can also benefit from the softer appearance of brown mascara. Who Should Wear Brown Mascara? Brown mascara suits everyone, from those with dark lashes, creating an almost black result, to blondes who enjoy a softer look. Brown mascara is perfect for everyday makeup and those wanting a subtle change without going for bold colored mascaras. What Is Brown Mascara Best For? Brown mascara is perfect for everyday looks and clean, soft makeup. It’s an excellent choice for those who want to try colored mascaras but are hesitant to go for vibrant shades like blue or purple. Brown Mascara for Every Eye Color Let’s explore how brown mascara can complement different eye colors: Brown Mascara for Brown Eyes Enhance the beauty of brown eyes with a defining formula like ALIMA PURE Natural Definition Mascara. Pair it with warm brown eyeshadow and hints of rust shimmer for a polished look. Brown Mascara for Hazel Eyes Opt for a mascara like Ultra Lengthening Mascara to bring out the multifaceted tones of hazel eyes. Combine it with warm browns from the Better Naked Palette for a true neutral look. Brown Mascara for Blue Eyes Choose a gentle mascara like ERE PEREZ Natural Almond Mascara for blue eyes. Create a subtle, natural look with brown-toned smokey eyeshadow or warm copper shades. Brown Mascara for Green Eyes For green eyes, W3ll People’s Expressionist Mascara provides a bold touch. Highlight green eyes with copper tones or purple eyeshadows from the Fruit Pigmented Eye Shadow collection. Brown Mascara for Dark Eyes Clean Mascara from HAN Skincare Cosmetics is perfect for highlighting dark eyes. Use deep shades like dark grays and browns, and add a touch of shimmer with Fruit Pigmented Eye Shadow in “Vanilla Sugar” for an everyday look. Read Also: How to Keep Mascara From Smudging? FAQs: Is brown mascara suitable for sensitive eyes? Yes, there are hypoallergenic options like Avène Couvrance Mascara High Tolerance Brown that are ideal for sensitive eyes and contact lens wearers. Can brown mascara be used for no-makeup makeup looks? Absolutely! Brown mascara is perfect for achieving a subtle, no-makeup makeup look, providing a softer contrast than black mascara. Can brown mascara be used on blonde lashes? Yes, brown mascara looks beautiful on blonde lashes, creating a softer and more natural look compared to black mascara. Is brown mascara suitable for everyday makeup? Certainly! Brown mascara is perfect for everyday looks, offering a subtle and flattering enhancement to your lashes without being too bold. How does brown mascara compare to black in terms of contrast? Black mascara creates a bolder contrast, while brown mascara provides a softer and more natural look, making it suitable for those who prefer a less dramatic appearance. Conclusion: Brown mascara is not just a trend; it’s a versatile beauty staple that suits everyone. Whether you’re looking to enhance your natural eye color, achieve a subtle everyday look, or make a statement with different eyeshadow pairings, brown mascara has you covered. Explore the recommended mascaras for a chocolaty twist on your eye makeup, and let your lashes shine with a touch of warmth and elegance. Embrace the beauty of brown mascara and discover the endless possibilities it brings to your makeup routine!

How to Use Texture Powder for Hair

How to Use Texture Powder for Hair?

Texture powder has become a beauty essential for achieving voluminous and effortlessly styled hair. From celebrities like the Kardashians to A-listers such as Emma Roberts, this styling product has gained popularity for its ability to add volume and create that coveted messy bedhead look. In this guide, we’ll explore what texture powder is, its benefits, and a step-by-step tutorial on how to use it for stunning results. What Is Texture Powder? Texture powder is a styling product formulated to add volume to hair. Made primarily of cornstarch, it is designed to be easy to apply without sticking to hands or face. The inclusion of waxes and oils provides slip for application while offering sufficient hold to maintain the desired style. Available in various textures and colors, it caters to different preferences for hold, making it versatile for a range of hairstyles. Does Texture Powder Work On All Hair Types? Yes, texture powder is suitable for all hair types. The amount used may vary based on hair type and the desired look. It can be applied to natural, relaxed, and color-treated hair. Adjust the quantity according to your specific curls—tight or loose—for optimal results. How to Apply Texture Powder Properly: A Step-by-Step Tutorial Benefits of Texture Powder: Read Also: Is Styling Powder Harmful to Your Hair? FAQs: What is texture powder made of? Texture powder is primarily made of cornstarch, with added waxes and oils for easy application and sufficient hold. Can texture powder be used on all hair types? Yes, texture powder is suitable for all hair types, and you can adjust the amount used based on your preferences. Is texture powder a permanent hair color? No, texture powder is not a hair dye and won’t permanently alter your hair color. How can texture powder be used as a dry shampoo? Texture powder absorbs oils, making it an effective alternative to dry shampoo when your hair appears greasy or oily. Is texture powder difficult to use? Not at all! Texture powder is easy to use. Simply spray it into your hands, distribute it through your hair, and style as desired. Can texture powder be used with other styling products? Absolutely! Texture powder can be used in conjunction with other styling products for a personalized and layered styling routine. Does texture powder leave a residue on the hair? When used correctly, texture powder should not leave a noticeable residue. Follow the recommended application steps for best results. How long does the effect of texture powder last? The effect of texture powder can last all day when set with hairspray, providing a long-lasting, voluminous style. Can texture powder be used on color-treated hair? Yes, texture powder is safe to use on color-treated hair. It won’t affect the color and can enhance volume for a stunning look. Can I use texture powder on short hair? Absolutely! Texture powder is versatile and works well on both short and long hair, adding volume and texture to any length. Conclusion: Texture powder is a fantastic addition to your beauty routine, providing an affordable and easy way to add volume and texture to your hair. Whether you prefer a natural, dramatic, or polished look, texture powder is a versatile styling product suitable for all hair types. Follow the steps outlined in this guide and experiment with different techniques for personalized results. Remember, less is more to avoid weighed-down or greasy hair. Enjoy the benefits of voluminous, styled hair with ease!

How to Keep Mascara From Smudging

How to Keep Mascara From Smudging?

Achieving perfect lashes is every makeup enthusiast’s dream, but the battle against mascara smudging can be real. In this comprehensive guide, we’ll delve into expert tips and tricks to ensure your mascara stays flawless throughout the day. From understanding the root causes of smudging to adopting a healthier lash routine, we’ve got you covered. Why Does Mascara Smudge? The Role of Hydration: The main culprit behind smudgy mascara is seriously hydrated eyelids. Despite the annoyance, oily lids are something to embrace, as they indicate healthier, more youthful skin. Dehydrated lids not only lead to a crepey appearance but can also cause mascara to slide off. Formula Matters: Mascara may smudge if its formula doesn’t effectively bond with your lashes. Ingredients play a crucial role, and if your mascara lacks the right components, you may end up with raccoon eyes before noon. Waterproof Mascara Myth: Contrary to popular belief, waterproof mascara isn’t foolproof. Chemical ingredients like polymers and silicones may resist water, but they can still smudge due to skin oils. Moreover, frequent use of waterproof mascara can damage and weaken your lashes. How to Prevent Mascara From Smudging? 1. Cleanse Your Face (and Lashes): Begin with a clean slate. Use a gentle cleansing product to remove all traces of makeup, including your lashes. Consider nourishing your lashes with organic coconut cream, such as RMS Beauty’s, to promote healthy lash growth. 2. Apply a Primer: Use an eyeshadow primer to control oily lids. Opt for a beauty oil that absorbs rapidly, keeping the skin hydrated without making it overly oily. 3. Use a Tri-Locking Mascara: Choose a mascara with tri-locking technology, like RMS Beauty’s Straight Up Volumizing Peptide Mascara. This natural formula bonds seamlessly with your lashes, providing long-lasting coverage without damaging chemicals. 4. Lightly Dust Under the Eyes — Never Bake: Avoid the “baking” method and opt for a light dusting of talc and clay-free translucent powder under the eyes. RMS Beauty’s Un-Powder is an excellent choice to prevent a cake-like appearance. 5. (Occasionally) Wipe Your Undereyes: Periodically blotting your under-eye area prevents excess oil buildup and removes any mascara smudges. Keep the area around your eyes clean and oil-free. 6. Apply Mascara Correctly: Be mindful of how you apply mascara. Focus on the front of your upper lashes, and for bottom lashes, refrain from applying more than one coat to avoid smudging. Should I Cover Mascara Smudges with Concealer? Covering smudges with concealer isn’t recommended, as it can lead to a caked-on appearance and exacerbate the smudging issue. Should I Put Clear Brow Gel on My Lashes? Using clear brow gel on lashes is not advised, as it can expose them to polymers and silicones. Stick to a high-quality mascara and use makeup remover wipes, like RMS Beauty’s, for easy cleanup. Smudge-Free Without Chemicals: Swap your regular mascara for a lengthening mascara with tri-lock technology. RMS Beauty offers clean formulas that keep your lashes in place without harmful chemicals. Read Also: What’s the Difference Between Cologne and Perfume? Celebrity Makeup Artists’ Tips: Conclusion: Achieving smudge-free lashes is a blend of understanding root causes, adopting a meticulous routine, and choosing the right products. By prioritizing hydration, using tri-locking mascara technology, and following expert tips, you can enjoy flawless lashes without the hassle of smudging. Embrace these insights for a beauty routine that keeps your lashes perfect from morning to night.

How to Fix Broken Eyeshadow

How to Fix Broken Eyeshadow?

Every makeup enthusiast has experienced the heartbreak of dropping a beloved eyeshadow palette, only to find their favorite shades shattered into pieces. The good news is that a broken eyeshadow palette doesn’t have to signal the end of its life. In this comprehensive guide, we’ll explore various methods to fix broken eyeshadow, share tips for preventing breakage, and even provide creative ways to repurpose shattered pigments. Methods to Fix Broken Eyeshadow Method 1: Fixing with Rubbing Alcohol What You’ll Need Process Expert Tip: Wait for 48 hours before using the product again to ensure proper drying and pressing. Method 2: Fixing with Hand Sanitizer What You’ll Need Process Method 3: Fixing with Micellar Water What You’ll Need Process Method 4: Fixing with Setting Spray What You’ll Need Process Fixing Without Additional Products Repurposing Broken Eyeshadow Palettes Nail Polish: Create custom nail polish colors by grinding broken eyeshadows into fine powder and mixing them with clear nail polish. Tinted Lip Balm: Repurpose vibrant shades into homemade lip tints by mixing crushed eyeshadow pigment with Vaseline or unscented lip balm. Colored Mascara: Crush bright-colored shadows and mix with clear mascara or brow gel for a unique colored lash or brow look. Highlighter or Bronzer: Use shimmering shades as highlighters or bronzers by crushing and mixing them with a neutral face powder. Read Also: How Can I Increase Collagen in My Skin? FAQs: Can you still use broken eyeshadow? Yes, as long as there are no changes in color, smell, or texture. Broken powder may be a bit harder to control on the brush. Does rubbing alcohol fix broken eyeshadow? Yes, rubbing alcohol is a secret weapon for fixing shattered eyeshadows. Crush, add alcohol, press, and let it dry. Can you use hydrogen peroxide to fix broken eyeshadow? Avoid using hydrogen peroxide, as it may alter the product’s composition and cause skin irritation. How do you fix broken eyeshadow with water? Water can be used, but results may vary. Mix crushed eyeshadow with water to form a paste, let it dry for 24 hours. Is it safe to use eyeshadow after fixing it? Yes, once completely dry, the repaired eyeshadow is safe for use. Monitor changes in texture or smell. Conclusion: Fixing a broken eyeshadow palette is a rewarding endeavor that saves both money and cherished makeup. Armed with these techniques and tips, you can revive your favorite eyeshadows, prevent breakage, and even repurpose them creatively. Accidents happen, but with this knowledge, they won’t ruin your makeup routine anymore. Remember, every broken eyeshadow has the potential for a fresh lease on life!