How Much Do Hair Extensions Cost at a Salon

How Much Do Hair Extensions Cost at a Salon?

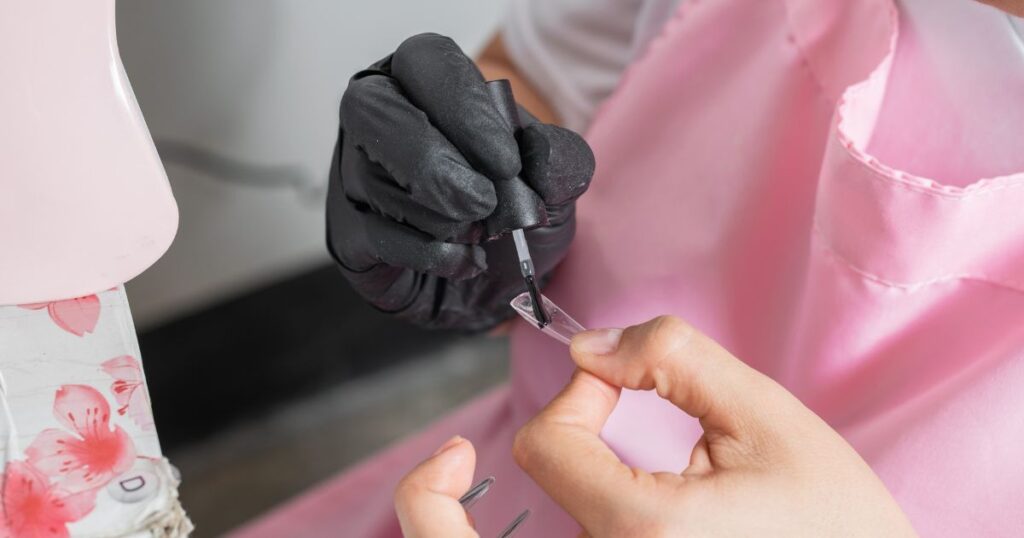
If you’ve ever daydreamed about having hair that flows like a river, cascading down your back, you’re not alone. The desire for long, luscious locks has led many to explore the world of hair extensions. Before you dive into this transformative journey, it’s crucial to understand the cost associated with different types of hair extensions and the factors that can influence the price. Types of Hair Extensions Clip-Ins Tape-Ins Fusion Extensions Human Hair Extensions The Average Cost of Hair Extensions Understanding the average cost per type is crucial before making a decision: Prices vary based on factors like length, thickness, and hair type. Factors Affecting the Cost of Hair Extensions Several factors can influence the price of hair extensions: Extension Type: Quality of Extensions: Length and Quantity: Installation Difficulty: Salon Location: Stylist Expertise: Additional Costs Associated with Hair Extensions Beyond the initial extension cost, consider maintenance expenses and potential removal costs. Maintenance, required every few weeks, and professional removal can add to the overall investment. Tips for Getting the Best Price Do Your Research: Choose an Experienced Stylist: Consider Package Deals: Opt for Clip-Ins: FAQs: How much is a head full of extensions? The cost varies based on the type of extensions, ranging from $100 to over $3,000. Can you shower with hair extensions? Depending on the type, most extensions allow showering, but specific care instructions should be followed. Can I sleep with extensions in? Yes, depending on the type. Clip-ins are usually removed before sleeping, while other types can be slept in comfortably. Read Also: How Long Does it Take to Highlight Hair? General Extension Cost Overview The cost of hair extensions and installation ranges from under $100 to over $3,000, reflecting the quality of the extensions, stylist experience, and the amount of hair used. Quality extensions, such as hand-tied or hybrid, can cost between $1,500 and $3,000, offering longevity and a seamless, natural look. Hand-Tied and Hybrid Extensions: Tape-In Extensions: Clip-In Extensions: Bonded Extensions: Micro-Beaded Extensions: Fusion Extensions: Conclusion: Finding the best price for your hair extensions involves research, informed choices, and consideration of your specific needs. By following these guidelines, you can enhance your look with extensions that not only fit your budget but also provide a seamless, natural appearance. Remember, investing in your hair is an investment in your confidence and style.

How Long Does it Take to Highlight Hair

How Long Does it Take to Highlight Hair? 2024

Have you ever wondered about the time it takes to achieve those perfect highlights that effortlessly elevate your look? In this comprehensive guide, we’ll take you through the intricate science behind the highlighting process, explore various techniques and their timelines, and provide tips to make the most out of your salon experience. Let’s dive into the details and answer the burning question: How long does it really take to highlight your hair? The Science Behind the Highlighting Process Lifting the Natural Color Understanding the timeline starts with unraveling the science behind highlights. Hair, primarily composed of keratin, holds melanin that determines its natural color. The lightening process involves applying a product with ammonia and hydrogen peroxide. The alkaline agent opens the hair cuticle, allowing the oxidizing agent to dissolve melanin, a process known as “lifting.” Time and Processing Careful monitoring of processing time is crucial and varies based on factors such as desired lightness, original hair color, and overall hair condition. Dark hair, containing more melanin, requires a longer processing time (typically 15 to 45 minutes), while lighter hair needs less time. Customizing Your Color To add a personalized touch, a toner can be applied after lightening to neutralize unwanted tones or introduce a specific color tint. Caring for Your Hair Post-Process Given that the highlighting process alters the hair structure, post-care is essential. Deep conditioning treatments help restore moisture and protein, ensuring your highlighted locks stay healthy and vibrant. Different Highlighting Techniques, Different Timelines Foiled Highlights When thinking of highlights, foiled highlights likely come to mind. This classic technique can take anywhere from 1.5 to 3 hours, depending on factors such as hair length and thickness. Achieving blonde highlights or transforming dark hair into a lighter shade may require extra processing time. Cap Technique For those seeking a nostalgic 90s look, cap highlighting is a great option. The time invested here is generally less than foiling, averaging around 1 to 2 hours. However, it’s best suited for short to medium-length hair and may not be the ideal choice for very long hair. Partial Highlight For a quick pick-me-up, a partial highlight, focusing on specific areas like the hair framing your face or the crown, can typically be done in less than an hour. This is the perfect solution if you’re short on time. Let’s Talk About Your Day While getting highlights can be time-consuming, it’s essential to remember that good things come to those who wait. During your salon visit, expect a detailed examination of your hair, a discussion about the highlights you desire, and then the actual highlighting process. Depending on factors like the chosen method, hair length, and thickness, allocate approximately 1 to 3 hours at the salon. Plan, Prep, and Prime For optimal results, arrive with freshly washed hair and a clear idea of the highlights you desire. Consult with your stylist about what works best for your hair color and lifestyle. Remember, the goal is to enhance your natural beauty, not overshadow it. Maximizing Your Processing Time Getting highlights isn’t just about the transformation; it’s also an opportunity for relaxation and pampering. Consider this time as your well-deserved break from the daily hustle. Bring a good book, catch up on social media, or engage in a pleasant chat with your stylist. Remember, the countdown to highlights doesn’t have to be a countdown to boredom – make the most of it! Read Also: How to Use Texture Powder for Hair? FAQs: How long should full highlights take? Full highlights generally take between 2 to 4 hours, influenced by factors such as hair length, highlighting method, desired lightness, stylist experience, and additional treatments. How long does it take to get highlights and layers? Full highlights take 2 to 4 hours, while layering can take 20 minutes to an hour. Expect to spend 3 to 5 hours for both services, varying based on factors like stylist speed and technique. Do highlights or full color take longer? Highlights tend to take longer (2 to 4 hours) than a single-process full color treatment (1 to 2 hours), influenced by hair color, desired results, techniques, and hair characteristics. Conclusion: To sum it up, the duration for getting highlights varies based on techniques, hair length, and desired results. So, plan accordingly, set aside ample time, and embrace the journey to redefine your look. Remember, good things come to those who wait, and the countdown to highlights doesn’t have to be a countdown to boredom. Enjoy the entire experience, and get ready to flaunt your fabulous new look!

Mastering the Art of Press-On Nail Removal

Mastering the Art of Press-On Nail Removal

Press-on nails have revolutionized the world of nail art, offering an affordable and convenient alternative to salon treatments. While applying press-ons is a breeze, the prospect of removing them, especially when glued, can be a concern for many. In this comprehensive guide, we’ll take you through the step-by-step process of safely and easily removing press-on nails with glue. Whether you’re a seasoned press-on enthusiast or a newcomer, these expert tips will ensure a hassle-free experience. The Ease of Press-On Nail Removal Celebrity nail artist Julie Kandalec attests to the simplicity of press-on nail removal, emphasizing that their plastic nature makes them easy on and easy off. In her professional opinion, any potential damage to the natural nail usually occurs before the press-ons are applied, alleviating concerns about removal-related damage. Preparation and Tools for Press-On Nail Removal To embark on a successful press-on nail removal journey, gather the necessary tools: a small bowl (preferably not plastic), nail clippers, cuticle nippers, a nail file, a nail buffer, and either liquid soap or pure acetone. Notably, having a second pair of cuticle nippers specifically for press-on removal is advised due to the plastic’s impact on blade integrity. For press-ons with 3D accents, experts recommend starting with a gentle filing process. This not only thins the press-ons but also facilitates the penetration of acetone or soap into crevices, expediting the removal process. Soaking Off Press-On Nails Create a soaking station by filling a bowl with warm water and adding liquid dish soap or acetone. Submerge your fingers for approximately 15 minutes, with the option to start gently pressing the tips up and down after 10 minutes. This gentle wiggling helps loosen the press-ons without causing damage. The choice between liquid soap and acetone is highlighted, with soap being a preferred option for those planning to reuse the press-ons. On the other hand, pure acetone is recommended for those looking to melt the tips down completely. Step-by-Step Removal Process Once adequately soaked, use an orangewood stick to gently lift off the press-ons. Never force them off, and if resistance is encountered, repeat the soaking process. Adding a drop of cuticle oil under the press-on can aid in creating slip for smoother removal. Buffing Away Adhesive Residue After successfully removing the press-ons, use a buffer to eliminate any remaining adhesive. Emphasis is placed on a gentle approach, especially when dealing with larger chunks of adhesive. The buffer should only be used on a small amount of residual adhesive to avoid potential damage. Post-Removal Care While press-on nails are less likely to cause damage compared to other falsies like gel extensions or acrylics, some dryness or irritation may occur post-removal. New York City-based dermatologist Joshua Zeichner recommends a good hand moisturizer to keep the outer skin layer in optimal condition. Adding cuticle oil further enhances nail moisture, with recommended products including Weleda Skin Food Ultra-Rich Cream for hands and Essie Apricot Cuticle Oil or Deborah Lippman Cuticle Oil for nails. Immediate Application of a New Set One of the perks of press-ons is the ability to reapply a new set immediately. As long as the press-ons are not picked or peeled off, you can proceed to choose and apply a new set without delay. Read Also: How to Trim Press-On Nails? FAQs: How long should you keep press-on nails on? Press-on nails can be kept on for 10 days to 2 weeks. If removing them sooner, wait at least a day or two to prevent potential nail damage. Do press-on nails damage your nails? Press-on nails generally do not cause damage if removed gently. Quick and forceful removal may lead to nail damage. Will press-on nails fall off in the shower? Press-on nails typically do not fall off in the shower. However, avoid using hot water, as it can weaken the glue. Can you reuse press-on nails? Yes, press-on nails can be reused if removed carefully. Use nail glue or tabs for reapplication, but be mindful of potential glue buildup. Conclusion: Mastering the art of press-on nail removal is as essential as the application process. By following these expert-recommended steps and utilizing the right tools, you can confidently enjoy the benefits of press-on without the fear of damaging your natural nails.

How to Trim Press-On Nails

How to Trim Press-On Nails?

If your press-on nails are looking a bit too long and in need of a trim, don’t worry – we’ve got you covered! In this comprehensive guide, we’ll walk you through the process of trimming press-on nails in a few simple steps. Whether you’re a nail enthusiast or just trying press-ons for the first time, follow these instructions to achieve a natural and polished look. Can You Trim Press-On Nails? Absolutely! Press-on nails are designed to be easily customizable to fit your preferences. Whether you want to modify them before or after applying them to your natural nails, trimming press-on nails is a straightforward process. You can use a nail clipper, just like you would with natural nails. Let’s dive into the details of how to trim press-on nails effectively. Press-On Nails Too Big? How to Trim Press-On Nails By following these steps, you can easily trim down those big press-on nails and achieve a natural, salon-like appearance. Can You Cut Press-On Nails With Regular Nail Clippers? Yes, regular nail clippers can be used for trimming press-on nails. The key is to ensure that the press-on have been allowed to sit for 2-3 hours to bond strongly with your natural nails before attempting to trim them. Regular nail clippers are effective and provide a clean cut, similar to natural or acrylic nails. Read Also: How Thick Should Acrylic Nails Be? Conclusion: Press-on nails offer the convenience of trimming long ones to your desired length and shape. They can be cut as easily as your natural nails, providing a versatile and accessible alternative. All you need is a nail clipper and press-on nails that are securely glued. It’s a fantastic option for achieving the perfect nail length without the need for constant salon visits.

How Thick Should Acrylic Nails Be

How Thick Should Acrylic Nails Be?

Acrylic nails have long been a popular means of expressing individual style and enhancing beauty. If you’re considering acrylic nails, it’s essential to understand the ideal thickness to ensure a long-lasting, comfortable, and stylish look. In this comprehensive guide, we’ll delve into the optimal thickness for acrylic nails, share tips on maintenance, explore the risks of acrylic nails being too thick, and provide expert advice on proper nail care. Let’s dive in! What is the Ideal Thickness for Acrylic Nails? The ideal thickness for acrylic nails typically ranges from 0.8mm to 1.5mm, catering to individual preferences for a natural or bold look. A medium-thickness layer (around 1.2mm) is often recommended professionally as it strikes a balance between strength and flexibility. Lifestyle considerations are crucial; thinner nails provide more ease of movement, while thicker ones offer a bolder appearance. When getting acrylic nails done, discussing your preferences and lifestyle with your nail technician is vital for a personalized experience. How to Maintain Acrylic Nails? Once you’ve determined the ideal thickness, maintaining acrylic nails is essential for longevity. Follow these tips: Apply Cuticle Oil Daily: Moisturize cuticles to protect them and add a healthy shine. Trim Regularly: Keep nails looking their best by trimming every few weeks. Use a Nail Strengthening Product: Protect acrylics from brittleness with a strengthening product. Avoid Damaging Activities: Be cautious during activities that could harm acrylic nails. Acrylic Nails Too Thick: Causes, Risks, and Treatment Options What are Acrylic Nails? Acrylic nails, a blend of liquid monomer and powder polymer, provide a customizable, durable layer over natural nails, popular for their versatility in shape, length, and color. Causes of Too Thick Acrylic Nails Overfilling during refills and improper application are common causes. Over-addition of new acrylic during refills or uneven blending may result in excessive thickness. Risks of Too Thick Acrylic Nails Thick acrylic nails can cause discomfort, pain, and nail damage, increasing the risk of infection. Proper nail care becomes challenging, leading to potential fungal infections. Treatment Options for Too Thick Acrylic Nails Visit a qualified nail technician to remove acrylic nails properly. Depending on the situation, excess acrylic may be filed down, or a fresh set may be applied after natural nails recover. Preventing Too Thick Acrylic Nails Choosing a skilled technician, communicating discomfort, and proper acrylic nail care are essential preventive measures. What if Your Acrylic Nails are Too Thick? If you find your acrylic nails too thick, professional solutions include filing them down with a nail file or having your nail technician use an electric drill. DIY attempts may risk damage, so it’s recommended to seek professional assistance. Can Acrylic Nails Be Thin? Yes, acrylic nails can be thin, with ultra-thin options as thin as 0.2mm or less. While perfect for a natural look, they may require more frequent touch-ups and may not last as long. Experimenting with Nail Shapes and Sizes Acrylic nails offer endless possibilities for shapes and sizes, from classic almond to glamorous talons. Choose a size and shape that fits comfortably, ensuring your acrylics don’t cause discomfort. Proper Nail Care: 10 Tips from Dermatologists for Healthy Nails Dermatologists recommend these tips for maintaining healthy and strong nails: Read Also: How Long Does It Take to Do Acrylic Nails? FAQs: Can thick acrylic nails cause permanent damage to natural nails? Yes, thick acrylic nails can lead to permanent damage, especially if applied or removed improperly. The added weight and pressure can cause splitting or lifting of natural nails, increasing the risk of infection. Proper rest and recovery are crucial. How can I tell if my acrylic nails are too thick? If your acrylic nails feel heavy, uncomfortable, or cause pain or pressure on natural nails, they may be too thick. Unevenness or varying thickness in different areas is also a sign. How can I find a qualified nail technician? Research and choose a licensed and experienced technician with expertise in acrylic nails. Seek recommendations and reviews from friends, family, or online sources. Can I remove thick acrylic nails at home? While possible, it’s recommended to have them removed by a professional to avoid damage to natural nails. Improper removal may lead to infection or complications. How can I prevent my acrylic nails from becoming too thick? Choose a qualified technician, communicate discomfort during application or refills, and practice proper acrylic nail care, including moisturizing and avoiding excessive pressure. Conclusion: Acrylic nails offer a versatile way to express individual style, but understanding their ideal thickness is crucial for a comfortable and long-lasting experience. With a recommended thickness ranging from 0.8mm to 1.5mm, personalized choices based on lifestyle and preferences play a significant role. Follow the provided tips for maintenance and proper nail care to ensure your acrylic nails always look their best.

How Long Does It Take to Do Acrylic Nails

How Long Does It Take to Do Acrylic Nails?

In the fast-paced world we live in, finding time for self-care has become essential. One popular way to treat oneself is by indulging in a set of acrylic nails. This comprehensive guide aims to answer the burning question: How long does it take to do acrylic nails? We will explore the entire process, costs involved, the longevity of acrylic nails, and essential tips for care. How Long Does It Take to Get Acrylic Nails? Acquiring a set of acrylic nails is not a quick salon visit. On average, the process takes around 45 minutes, with variations depending on factors such as the technician’s skill, the complexity of the design, and your specific requirements. Choosing intricate designs or shapes like stilettos may extend the time to an hour or even two. The experience and expertise of your nail technician play a crucial role in the overall duration. How Much Does It Cost to Get Acrylic Nails? Understanding the cost of acrylic nails is crucial. On average, expect to pay around $40 for a full course of acrylic nails, including regular nail polish. If you opt for gel polish, an additional $15-$20 may be charged. Complex designs or nail art may incur extra costs. Remember, tipping your nail technician is common, with an additional $10 to $20 being customary. How Long Do Acrylic Nails Last? Acrylic nails boast durability, lasting approximately 2 months. Regular fill-in sessions every two to three weeks are necessary as your natural nails grow, creating a gap between the acrylic and the nail bed. It is more cost-effective to undergo a fill-in than a full set. Signs such as brittleness, looseness, or air bubbles indicate the need for replacement. Can You Get Acrylic with Short Nails? Acrylics offer a solution for individuals with difficulty growing their nails. Even if you have short nails, acrylics can be added to enhance length and achieve the desired look. How Often Should You Take a Break From Acrylic Nails? While acrylic nails enhance beauty, it’s crucial to give your natural nails a break. Experts recommend taking a hiatus every three to six months. This break allows your natural nails to grow and strengthen, preventing potential damage from prolonged acrylic use. Immediate removal is necessary if you notice issues like peeling, color changes, or signs of infection. Acrylic Nails: Insights from Nail Care Experts Delving into the insights from nail care experts, we discover that a full set of acrylic nails is the go-to choice for long-lasting manicures. Kayla Bramlet, Director of Education and Training for Frenchies Modern Nail Care, suggests that the entire process, from prep to application, can take anywhere from an hour to an hour and a half. Opting for a natural alternative to acrylics, such as gel extension manicures, is gaining popularity for eliminating toxic chemicals. How Are Acrylic Nails Applied? Understanding the technicalities of acrylic nail application is essential. The process involves filing and shaping your natural nails, applying a dehydrating solution, adding a primer for adhesion, and then carefully sculpting acrylic material onto each nail. Unlike gel polish, UV light is not required for the curing process. The final steps include sealing the artwork with a top coat. Factors Affecting the Duration of Acrylic Nail Appointments: Several factors influence how long an acrylic nail appointment takes. The experience level of the technician, the prep work needed for your natural nails, the desired shape and length, the complexity of the design, the type of polish or nail art, and whether French tips are included can all impact the overall duration. On average, a full set of acrylic nails takes about an hour, but variations exist based on these factors. How Long Does It Take to Get a Fill in Nails? The time required for a fill-in session depends on factors such as your nail type, length, and thickness. Generally, you can expect to spend between 30 to 60 minutes for a fill-in appointment. How Long Does It Take For Acrylic Nails to Dry? The drying time for acrylic nails is influenced by environmental factors like temperature and humidity. On average, acrylic nails take between 30 minutes to an hour to fully dry. How to Remove Acrylic Nails? Removing acrylic nails can be done at home or professionally. If opting for self-removal, soaking your nails in acetone for about 20 minutes is the first step. Gently scrape off softened acrylic with a nail file or emery board, and wash hands to remove any residue. Read Also: How Long Do Silk Wrap Nails Last? FAQs: How long does it take to do acrylics at a nail salon? On average, acrylic nails take about an hour at a nail salon. How often should I get my acrylics done? Acrylics should be redone every two to three weeks to prevent nail damage. What is the best way to remove acrylic nails? The best way is to visit a salon for professional removal. For DIY, soak nails in acetone, gently scrape off softened acrylic, and wash hands. How much does it cost to get acrylic nails? The average cost ranges between $30 and $50, depending on the salon and style. Do acrylics hurt? Acrylics can cause discomfort if improperly applied or if there is damage to the nail bed. Maintain proper care to avoid pain. Conclusion: Acrylic nails offer a durable and versatile option for enhancing your manicure. Understanding the time, cost, and care involved is crucial for making informed decisions. Whether you’re a seasoned acrylic enthusiast or a first-timer, this comprehensive guide has provided insights into the world of acrylic nails. Remember to prioritize the health of your natural nails and indulge in acrylics responsibly.

How to Make Waxing Less Painful

How to Make Waxing Less Painful?

Waxing, while an effective method of hair removal, is often associated with pain. However, with the right techniques and precautions, you can transform your waxing experience into a more tolerable and even pain-free process. In this blog post, we’ll explore practical tips to make waxing less painful, covering different body areas and addressing common concerns. What Is Waxing? Waxing is a temporary hair removal method that involves using hot wax to remove hair from the root, providing smoother skin for an extended period, typically up to six weeks. This method is preferred for its long-lasting results compared to shaving. Top 10 Ways to Make Waxing Less Painful: Seek a professional who is experienced in waxing: Exfoliate the area before waxing: Dull the nerves: Reduce acidity: Use the right type of wax: Use a body scrub: Take a pain reliever: Use quality wax: Be sure to breathe: Have realistic expectations: Does Waxing Hurt? Additional Tips for a Pain-Free Experience: Time it Right: Prepare Yourself: Perfect the Technique at Home: Exfoliate Before Waxing: Soak in a Warm Bath First: Breathe: Ensure the Hair is of the Right Length: Wear Loose Clothes Afterwards: Stop Shaving: Don’t Wax If You Have a Sunburn: Look after Yourself: Your skin will be sensitive or even a little sore after waxing, so it is best not to irritate it further. Refrain from exfoliating, using soap, or applying deodorants. Avoid exposing the skin to direct sunlight for a more comfortable recovery. Read Also: Which Is Better: Eyebrow Threading or Waxing? FAQs: Is waxing a permanent hair removal method? No, waxing is a temporary hair removal method that removes hair from the root, providing smooth skin for up to six weeks. How can I reduce pain during waxing? To reduce pain during waxing, consider seeking a professional, exfoliating before the session, dulling nerves with numbing agents, and practicing deep breathing. Can I wax if my hair is too short? Hair should be approximately 1/4 inch long for effective waxing. If the hair is too short, the wax may not grip it properly, causing more pain. How long should I wait before wearing tight clothing after waxing? It’s advisable to wear loose clothing for 24-48 hours after waxing to allow the skin to breathe and prevent irritation from tight fabrics. Conclusion: By following these comprehensive tips, you can transform your waxing experience from painful to tolerable and even pain-free. From choosing the right professional and wax type to preparing your skin and adopting proper aftercare, these strategies ensure a smoother and less painful waxing journey. Embrace these tips for a more enjoyable hair removal experience that leaves you with silky smooth skin.

Winter Skincare Routine

Winter Skincare Routine: Achieving Radiance Despite the Chill

As the winter season sets in, many of us look forward to cozy blankets and warm clothes but dread the side effects of dry, dull skin, chapped lips, and cracked cuticles. The combination of low humidity, freezing temperatures, and indoor heating can rob our skin of moisture, leaving it longing for some extra care. However, fear not! Adapting your skincare routine during these colder months can make a significant difference in maintaining a healthy and glowing complexion. In this guide, we’ll explore essential steps and honey-infused recommendations to keep your skin nourished and radiant until spring. Why Change Your Skincare Routine for Winter? Winter’s harsh conditions demand a shift in your skincare approach. The low humidity levels contribute to moisture loss, making it crucial to focus on both humectants and emollients. These elements draw in and lock in moisture, respectively. Simple adjustments, such as switching to richer moisturizers, exfoliating less frequently, and using a calming cleanser, form the foundation of your winter skincare routine. Winter Skincare Tips: A Step-by-Step Guide Step 1: Cleanse Initiate your routine with a gentle cleanse. Opt for sulfate and phthalate-free cleansers to avoid stripping the skin of its natural oils. If you have dry skin, consider using a cream or milk formula. Use warm water, as hot water can further irritate and dry out your skin. Step 2: Serum Apply a hydrating serum, such as one containing Hyaluronic Acid, before your moisturizer. Serums are lightweight and packed with active ingredients that penetrate the skin’s deeper layers, offering benefits like hydration and brightness. Step 3: Moisturizer Follow up with a face cream or moisturizer to create a protective barrier that locks in hydration. Winter calls for richer formulas to prevent moisture loss and assist the skin’s uppermost layer in retaining moisture. Step 4: Face Oil Enhance your routine with the Honey Infused Face Oil. Ideal for winter, this antioxidant-rich oil soothes the skin, locks in hydration, and reinforces the skin barrier. You can mix it with your moisturizer or use it as the final step for a luxurious winter ritual. For an indulgent pampering session, incorporate a Gua Sha routine using the Honey Infused Face Oil. Apply the oil generously to facilitate smooth movements, reducing tension and puffiness while promoting a rosy complexion. Step 5: SPF In the morning routine, finish with SPF to protect your skin from UVA and UVB rays. Sunscreen is crucial even in winter, as the sun’s rays can still cause damage. Body Care Routine for Winter: Extending the Glow Extend your skincare routine beyond the face to address the body’s winter woes. After showering, apply the Honey Infused Body Oil to damp skin for enhanced absorption. This lightweight oil, rich in vitamins and fatty acids, rejuvenates dry skin, increasing elasticity. For added moisture, layer your favorite body lotion or milk over the body oil. Tackling Extra Dry Areas: The Beauty Balm Solution Problem areas like elbows, knees, and cuticles may require extra attention. Integrate the Honey Infused Beauty Balm into your routine. Beauty balms offer intense nourishment, soothing dry, chapped skin and fortifying the skin barrier. Apply the balm to exposed areas, providing a protective layer against wind and cold. Soft Lips in Winter: Special Care for Delicate Skin Combat chapped and dry lips by exfoliating gently with an organic or homemade scrub. This prepares the lips for better absorption of lip balm. Consider Coco Soul’s lip care products for an extra dose of tender loving care. Winter Skincare Tips According to Different Skin Types: Normal Skin: Dry Skin: Oily Skin: Combination Skin: Balance oily and dry areas with gentle cleansers and a pH-balancing toner. Winter Skincare Tips for Colder Days: Moisturize in the day & night: Use SPF: Stay hydrated with water: Avoid hot showers: More than lip balms: Ingredients for Winter Skincare: Retaining Moisture: Calming Skincare: Brightening Skincare: Subtle Adjustments to Winter Skincare Routine: The Best Cleansers for Winter: Use Face Oils in Winter: Reduce Acid Strength in Winter: Use a Heavier Moisturiser in Winter: FAQs: Why is skincare during winter important? Prolonged exposure to cold weather can lead to dry and flaky skin. A winter skincare routine helps combat these issues. What should we apply as skincare during winters? Adjust your routine with thicker moisturizers and SPF. Choose products free from harsh chemicals. What is the best skincare product for the winter season? The best products are those suited to your skin type, free from harsh chemicals. Read Also: How to Get White Out Off Skin? Conclusion: Adapting your skincare routine for winter is not about a complete overhaul but rather making subtle adjustments to cater to your skin’s changing needs. The harsh winter conditions call for extra care, and by incorporating hydrating, calming, and brightening ingredients, you can achieve a radiant complexion despite the chill. From cleansers and serums to face oils and SPF, each step plays a crucial role in protecting your skin from the drying effects of winter. Remember, everyone’s skin is unique, so it’s essential to find what works best for you. Whether you have normal, dry, oily, or combination skin, the key is to choose products that suit your specific needs. As you embark on your winter skincare journey, show your skin the love and attention it deserves, and you’ll be rewarded with a healthy, glowing complexion throughout the colder months.

How to Keep Press On Nails From Popping Off

How to Keep Press On Nails From Popping Off?

Press-on nails have revolutionized the world of nail art, offering a quick and budget-friendly alternative to salon visits. However, the frustration of press-on nails popping off prematurely is a common issue. Fear not, as we’ve compiled a comprehensive guide with nine expert tips to ensure your press-on nails stay put, providing a flawless and long-lasting manicure. Invest in a Good Nail Glue: The cornerstone of a lasting press-on nail experience is a high-quality, professional-grade nail glue. While some press-on nails come with built-in adhesive, reinforcing the bond with extra nail glue, particularly a trusted brand like Nail Bond, can extend the lifespan to an impressive 2-3 weeks. Prep Your Cuticles: Cuticles play a crucial role in adhesion. Use a cuticle pusher to gently remove dead skin and shape cuticles, creating a smooth surface for the press-on nails to adhere to comfortably. Buff Your Nails: Buffing is a vital step to remove the oily top layer of your natural nails, enhancing the glue’s bonding capability. Be cautious not to over-file, as this can weaken the nails. Properly Clean Your Nails Before Application: Before applying press-on nails, ensure your nails are clean and dry. Remove any polish, acrylics, or previous glue residue. Washing hands with antibacterial soap and wiping nails with rubbing alcohol eliminates natural oils, optimizing glue adhesion. Apply Your Press On Nails Correctly: Apply glue to both your natural and press-on nails, holding each nail for at least 30 seconds to allow a strong bond. Avoid contact with water for 1-2 hours after application to let the glue cure completely. Apply a Clear Top Coat Over Your Press-on Nails: Strengthen and protect your press-on nails with a clear top coat. This not only adds a glossy finish but also acts as a water-resistant seal, ensuring the longevity of the nail glue. Avoid Exposing Your Nails to Harsh Conditions: Protect your press-on nails from excessive heat, moisture, and strong chemicals. Use gloves during chores, avoid prolonged exposure to water, and refrain from using your nails as tools. Shorter Press-On Nails Last Longer: Opt for shorter press-on nails for increased durability. Longer nails have a larger surface area, making them more prone to tension and stress that can weaken the nail glue. Use Press-On Nails That Fit Your Nail Size: Proper sizing is key to preventing lifting and strain. Ensure press-on nails fit snugly and consider filing them to match your natural nail size. Read Also: How Long Does Eyebrow Threading Last? FAQs: Can I use adhesive pads instead of nail glue? While pads are an option, professional-grade nail glue provides a stronger bond for longevity. How long should I avoid water after applying press-on nails? It’s recommended to avoid water for 1-2 hours to allow the glue to cure. Can press-on nails be reused? Yes, with proper removal and cleaning techniques, press-on nails can be reused. Why avoid exposing press-on nails to harsh conditions? Exposure weakens the glue, leading to premature popping off. How to remove press-on nails without damaging natural nails? Gently peel off or soak in warm water, followed by acetone or nail polish remover for any residue. Conclusion: Achieving a stunning and enduring manicure with press-on nails is not only possible but easy with these expert tips. By investing in quality products, proper preparation, and mindful care, you can enjoy the beauty of press-on nails without the worry of premature popping off. Elevate your nail game with these strategies for a glamorous and long-lasting experience.

How Long Does Eyebrow Threading Last

How Long Does Eyebrow Threading Last?

Embarking on the journey of eyebrow threading for the first time can be both exciting and nerve-wracking. You might be pondering questions like, “Is it painful?” or “How often should I have my eyebrows threaded?” In this comprehensive guide, we’ll walk you through the world of eyebrow threading, addressing common concerns and providing valuable insights to make your experience smoother. Eyebrow Threading: A Natural Hair Removal Method: Eyebrow threading stands out as a natural and pure form of hair removal, using a twisted cotton thread to delicately remove unwanted hair from the eyebrows. This method is chemical-free, making it a safe option for all, particularly those with sensitive skin or specific medical conditions. Unlike waxing, threading doesn’t compromise the skin’s layers, setting it apart as a gentler alternative. Comparison with Waxing: The age-old debate between threading and waxing often leads to the question of which lasts longer. Both methods aim to pull hair from the root and follicle, potentially hindering rapid regrowth. However, threading proves more accurate and less damaging to the skin compared to waxing. The latter can sometimes remove hairs that are meant to stay, leaving you with thinner brows. How Long Does Eyebrow Threading Take? One of the appealing aspects of eyebrow threading is its efficiency. The actual threading process typically spans between 5 to 15 minutes, depending on the individual’s eyebrow thickness and desired shape. This makes it a quick and effective option, especially for those with busy schedules. Is Eyebrow Threading Painful? Addressing the elephant in the room – the pain factor. Eyebrow threading, like any hair removal method, may cause discomfort, but the intensity varies from person to person. Described as a quick, sharp pinch or slight sting, the pain tends to diminish with subsequent sessions as your skin becomes accustomed to the process. What to Expect During Your Eyebrow Threading Session: As you sit back for your eyebrow threading session, the threading specialist will skillfully use a twisted cotton thread to remove unwanted hair from your eyebrows. Expect the process to be swift, catching and pulling out hairs from the follicle. Post-threading, mild redness or swelling is normal, typically subsiding within a few hours. Preparing for Your First Eyebrow Threading: To ensure a seamless experience, refrain from tweezing or waxing your eyebrows for at least two weeks before your threading appointment. A clean face, achieved by using a gentle cleanser, provides the threading specialist with a better grip on the hairs. Arrive with a clear idea of your desired eyebrow shape to guide the specialist effectively. How to Make Redness Go Down After Threading: While some redness or swelling post-threading is normal, you can take steps to minimize it. Applying a cold compress, aloe vera, or a calming cream can soothe the skin. Avoid makeup and heat-producing activities for a few hours to facilitate the healing process. How Long Does It Take for Eyebrows to Grow Back After Threading? The million-dollar question – how long until your eyebrows grow back after threading? On average, expect a regrowth period of 4 to 6 weeks. The silver lining is that the hair tends to grow back finer and sparser, requiring fewer touch-ups over time. How Often Should You Get Your Eyebrows Threaded? The frequency of eyebrow threading is subjective and depends on individual preferences and hair growth rates. A common maintenance schedule is every 3 to 4 weeks, but some may need more frequent touch-ups, while others can extend the time between appointments. Maintaining Your Eyebrows Between Threading Sessions: Resist the urge to tweeze between threading appointments, instead opting for a brow gel or powder to keep unruly hairs in check. A good brow brush helps maintain neatness. Use brow products sparingly to enhance your natural shape without overloading. Consider a growth serum for sparse areas. FAQs: How often should I have my eyebrows threaded? Recommended every 3 to 4 weeks, based on individual preferences. How much does eyebrow threading usually cost? Prices range from $10 to $40, contingent on location and specific requirements. Is eyebrow threading painful? Generally considered less painful than waxing. Do threads help to grow eyebrows? Threading damages hair follicles, leading to smaller hair growth over time. Read Also: How to Get Rid of Nail Growth Under Acrylics? Conclusion: Embrace the world of eyebrow threading as a quick and effective way to shape and groom your eyebrows. Understanding the process, managing expectations about pain, and practicing aftercare tips will contribute to a positive experience. Bid farewell to unwanted hair with this natural and time-tested technique, and revel in beautifully shaped eyebrows for weeks to come.