Gel Nail Polish Pros and Cons

Gel Nail Polish Pros and Cons: A Comprehensive Guide

Every nail salon across the globe offers gel nail polish services, making it a popular choice for nail art enthusiasts. The debate around whether gel nail polish is beneficial or harmful has fueled numerous rumors and myths. In this article, we aim to provide an honest exploration of the pros and cons of gel nail polish. The Pros of Gel Nail Polish 1. Looks And Feels Good 2. Long-Lasting 3. Quick Dry Time 4. Always Looks Fresh 5. Endless Nail Looks 6. Flexible 7. Easy To Use The Cons of Gel Nail Polish 1. You Need Breaks 2. Acetone Soak 3. UV/LED Light 4. Salons Are Expensive Gel Polish vs. Regular Polish Gel Polish Pros and Cons Regular Polish Pros and Cons Gel Nail Polish Comparison Aspect Gel Polish Regular Polish Durability Lasts up to 2 weeks Prone to chipping Drying Time Quick, under UV light Longer drying time Removal Process Requires soaking and filing Simple nail polish remover application Cost Higher cost, potential long-term savings with at-home kits Affordable, budget-friendly UV Exposure UV exposure during curing No UV exposure, safer Read Also: FAQs: Are gel nail polish kits suitable for amateurs? Yes, most beauty outlets offer DIY gel nail polish kits, including beginner-friendly options. How often should I take breaks between gel manicures? It is recommended to take a week-long break for every 8 weeks of continuous gel manicures to maintain nail health. Can gel nail polish be removed without acetone? Yes, alternatives like peel-off base coats or specialized removers can reduce the reliance on acetone for gel polish removal. Are UV/LED lamps for gel nails safe for sensitive skin? Quality lamps with adjustable intensity settings, such as the Professional LED Gel Lamp, offer safety for even the most sensitive skin. Conclusion The choice between gel nail polish and regular polish involves weighing the benefits and drawbacks based on personal preferences and lifestyle. While gel nails offer durability and aesthetic appeal, regular polish provides affordability and simplicity. Whether opting for a salon service or an at-home kit, understanding the pros and cons is crucial for making an informed decision. Remember to prioritize nail health and take breaks when necessary for the overall well-being of your nails.

How to Take Off Glitter Nail Polish

How to Take Off Glitter Nail Polish?

Glitter nail polish adds a touch of glamour to your manicure, but removing it can be a daunting task. The unique texture of glitter makes it more challenging to remove than regular nail lacquer, and improper removal can lead to damage. To tackle this issue, we’ve compiled expert advice and effective methods to help you easily remove glitter nail polish without harming your nails. Method 1: Top Coat Technique Step 1: Start With Topcoat Contrary to intuition, begin by applying a fresh layer of any non-glitter top coat. According to Sarah Gibson Tuttle, founder of Olive & June, this step helps in the removal process. Step 2: While the Topcoat Is Still Wet, Use Nail Polish Remover Without waiting for the top coat to dry, use nail polish remover (you can use a product like Olive & June’s Polish Remover Pot) on a soaked cotton ball. The tackiness of the top coat will aid in grabbing onto the glitter, making it easier to dissolve both layers. Step 3: Gently Buff Away Any Remaining Glitter Although this method is gentle, some glitter may still linger. Lightly buff the nails, ensuring not to use anything too coarse. Finish by swabbing a final coat of remover to ensure cleanliness. Method 2: Buffing Technique Step 1: Buff to Break the Polish Seal Gently buff the first layer of polish to break the seal. Be cautious not to damage the nail plate during this step. Step 2: Saturate Cotton Balls in Nail Polish Remover and Use Tinfoil Soak cotton balls in nail polish remover and place them on each nail. Wrap your nails with small pieces of tinfoil to secure the cotton balls. Leave them on for three to five minutes. Step 3: Remove the Foil and Cotton Balls After the allotted time, remove the foil and cotton balls. The remover will effectively eliminate the glitter. After Care for Glitter Manicures After removing glitter polish, take care of your nails to maintain their strength and health. How to Make Your Next Glitter Nails Easier to Remove? Prepare your nails for the next glitter application with these steps: Read Also: Why Does Nail Polish Bubble?Why Your Nail Polish Keeps Peeling Off? FAQs: Why is glitter nail polish harder to remove than regular polish? Glitter polish is made of non-porous materials like glass, mylar, or aluminum, making it difficult for acetone to penetrate. It adheres to the nail as it dries, complicating the removal process. Can I use a peel-off base coat for easier removal? Yes, peel-off base coats are an option for easier removal. However, they may reduce the longevity of your manicure as they are more prone to peeling off. How often should I change my glitter manicure? If you love glitter polish but want to minimize the hassle of removal, consider changing your manicure every few days. Peel-off base coats can be particularly useful for short-term use. Conclusion Glitter nail polish adds a festive touch to any manicure, but proper removal is key to maintaining healthy nails. By following the recommended methods and aftercare steps, you can enjoy glittery nails without the fear of damage. Remember to prep your nails before each application for an easier removal process. Now, go ahead and shine with your favorite glitter nail polish without worries!

Can You Get Lip Fillers at 17

Can You Get Lip Fillers at 17?

The allure of plump, kissable lips is undeniable, and lip fillers have become a popular way to achieve that ideal look. But what if you’re still a teenager? Can you get lip fillers at 17? The answer is a bit nuanced, and this guide will delve into everything you need to know about lip fillers for teens, including safety concerns, legal aspects, and alternative options. The Age Factor: Why 18 Matters (For Now) The U.S. Food and Drug Administration (FDA) has approved lip fillers like Juvederm and Restylane for patients 21 years old and over. This regulation is based on concerns about the safety and ethical implications of injecting cosmetic fillers into individuals whose facial features are still developing. However, some healthcare providers may be willing to treat patients as young as 18 with parental consent. This decision involves a thorough assessment of the patient’s maturity, motivations, and understanding of the risks and benefits. Before You Consider the Needle: A Reality Check Getting lip fillers at 17 is a significant decision that shouldn’t be taken lightly. Here are some crucial points to consider: Exploring Alternatives: Natural and Non-Invasive Options Before resorting to lip fillers, consider these alternative ways to enhance your lips: The Importance of Choosing the Right Provider:  If you’re still considering lip fillers, prioritize finding a qualified and experienced healthcare provider. Here are some key factors to consider: Navigating the Legalities: Parental Consent and Beyond In most regions, including the U.S., parental consent is mandatory for any cosmetic procedure performed on a minor. This requirement underscores the importance of involving parents in the decision-making process. Beyond legalities, open communication and understanding between parents and teens are crucial for informed decision-making and preventing potential conflicts or regrets in the future. Read Also: FAQs: What are the long-term effects of getting lip fillers at 17?  The long-term effects of lip fillers on a developing face are unknown. Consulting a qualified healthcare professional can help you understand the potential risks and benefits specific to your situation. Are there any natural alternatives to lip fillers? Yes, as mentioned earlier, makeup, lip plumpers, and facial exercises can offer natural ways to enhance your lips. What happens if I get lip fillers underage without parental consent?  The consequences of such actions will vary depending on local regulations. It’s best to consult with a healthcare professional or legal expert for specific guidance. Conclusion: Getting lip fillers at 17 is a complex decision with legal, ethical, and personal considerations. Carefully weigh the risks and benefits, explore alternative options, and prioritize finding a qualified healthcare provider if you choose to proceed. Remember, building self-confidence through self-acceptance and healthy practices is often the most rewarding and sustainable path to achieving the best version of yourself.

Why Does My Hair Grow in Layers

Why Does My Hair Grow in Layers?

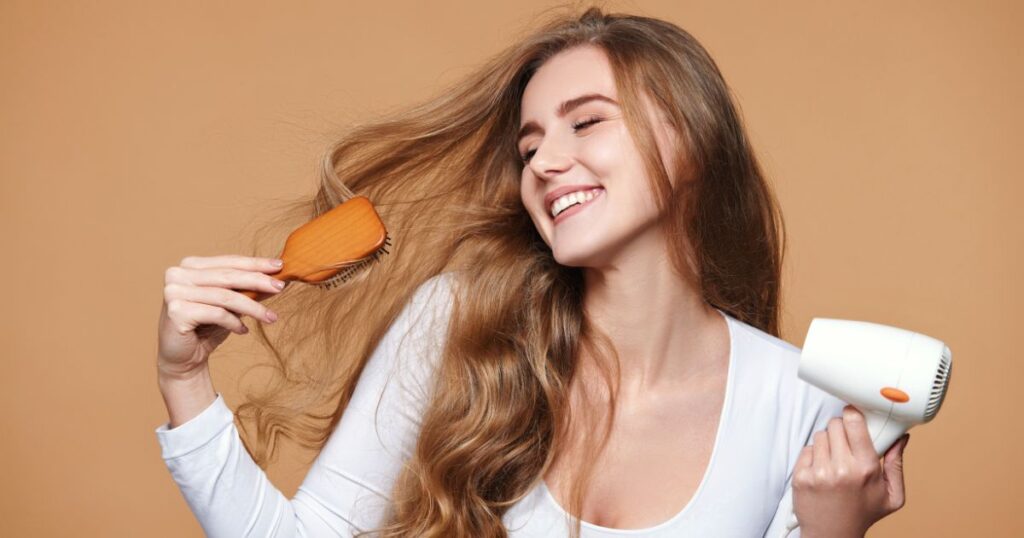
Have you ever wondered why your hair seems to grow in layers, with different sections appearing longer or shorter than others? As a professional hairstylist, I’ve encountered numerous questions and misconceptions about hair growth and layers. In this comprehensive guide, we’ll delve into the fascinating world of hair growth patterns, addressing common myths, discussing the importance of trimming, and shedding light on the factors influencing natural layering. Understanding Hair Growth Rates and Asymmetry Hair growth is a dynamic process, with the average rate ranging from a quarter to half an inch per month. However, individual variations abound, leading to different growth rates among people. It’s crucial to recognize that hair is not symmetrical; asymmetry is a natural occurrence in our bodies, extending to our hair. Some individuals experience faster and fuller growth on one side, adding a unique dimension to their overall appearance. Dispelling the Myth of Layered Hair Growth One prevalent misconception is that hair grows in layers. This is a misunderstanding rooted in the observation that different sections of the hair may appear to grow at varying rates. Picture shaving your head bald and allowing your hair to regrow; each strand should ideally be the same length. However, due to the varying heights on the head, these uniform-length strands may hang down, creating an illusion of layers. Insights into Trimming Practices Trimming is an essential aspect of maintaining healthy hair, but confusion often surrounds when, why, and how much to trim. Let’s break down the reasons behind trimming: 1. Eliminating Split Ends: Trimming is crucial to remove split, stringy, or see-through ends, promoting overall hair health. 2. Addressing Damage: Chemical processes like coloring, relaxers, and perms can cause damage. Trimming helps remove compromised strands and prevents further issues. 3. Maintaining Fresh Ends: Regular trims, tailored to your hair’s needs, contribute to a polished and well-maintained appearance. Trimming frequency depends on individual factors. Monthly trims may be excessive for those with healthy hair, while chemically treated hair may benefit from a 6 to 8-week regimen. Natural hair enthusiasts should also embrace regular trims, dispelling the notion that only chemically treated hair requires attention. The Truth About Naturals and Trimming Naturals, too, need to prioritize trimming. Split ends can make hair feel coarser and hinder manageability. Those with afros should especially consider regular trims, given the constant exposure of their ends to styling elements. Trimming knots instead of ripping through them is a gentle approach to maintaining healthy natural hair. Unraveling the Mystery of Natural Layering Natural layering of hair is a result of various factors, including genetics, hair growth patterns, stress, and damage. Understanding these aspects provides insights into why your back hair may be longer than the front or why certain sections exhibit uneven growth. Genetics: Family genes play a pivotal role in determining hair growth patterns, with some individuals naturally predisposed to layered hair. Hair Growth Patterns: The way hair grows, influenced by follicle structure and growth directions, contributes to the layered effect. Stress and Damage: External factors such as stress, heat, and chemical damage can disrupt normal growth, leading to uneven layers. Right or Left-Handed: Surprisingly, whether you’re right or left-handed can influence how your hair grows, as styling habits may differ. Strong Growth Direction: Hair growing in a specific direction can create layers that add volume and character to your overall look. Managing Natural Layers While natural layers can pose styling challenges, they also enhance fullness and add character. Embracing or altering these layers is a personal choice. You can opt to maintain natural layers or choose a haircut that evens out the lengths. Cutting for a neater appearance or letting your hair grow for a more relaxed look are both valid options. Cracking the Code of Hair Growth Patterns Hair growth patterns play a crucial role in hairstyling, and understanding your unique pattern is essential for a tailored haircut. Different types of growth patterns include cowlicks, double crowns, widow’s peaks, whorls, and ducktails. Each pattern requires specific attention during cutting to achieve the desired style. Cowlick: Hair growing in one direction, often standing out when cut too short. Double Crown: Two spirals in the parietal area, challenging to handle during cutting. Widow’s Peak: Hairline meeting in a V-shape, creating a distinctive appearance. Whorl: Spirals of hair growing in the opposite direction, forming a circular or spiral shape. Ducktail: A hairstyle where hair grows towards the nape, forming a V-shape. Why Hair Growth Patterns Matter? Understanding your hair growth patterns is vital for a haircut that complements your unique features. Stylists consider factors like hair flow, follicle inclination, and growth direction to ensure your hairstyle grows out gracefully. Neglecting these patterns may result in unexpected changes as your hair regrows. Insights into Natural Hair Growth Knowing the intricacies of how hair grows naturally is a valuable asset. Hair growth is cyclical, consisting of anagen, catagen, and telogen phases. These phases determine the active growth, regression, and resting periods of each hair strand. While the average growth rate is around 1 centimeter per month, external factors like stress and hormones can influence the process. Optimizing Hair Growth for Your Unique Needs Understanding your hair growth patterns empowers you to make informed decisions for optimal hair care. Whether you aim to speed up hair growth or address slow growth, tailoring your routine to your specific needs is key. Explore tips and guides on maintaining healthy hair, identifying early signs of balding, and promoting growth through a balanced lifestyle. Read Also: FAQs: How often should I trim my hair? Trimming frequency depends on various factors, including your hair’s health and whether it undergoes chemical processes. Monthly trims may be excessive for healthy hair, while chemically treated hair may benefit from a 6 to 8-week regimen. Do natural hair enthusiasts need to trim their hair? Yes, naturals should prioritize regular trims to eliminate split ends and maintain overall hair health. Trimming knots, especially for those with afros, is essential to prevent damage and maintain manageable hair. Why does …

Why Does My Hair Grow in Layers? Read More »

Why Does Nail Polish Bubble

Why Does Nail Polish Bubble? And How to Avoid It

Achieving a flawless, bubble-free manicure can be a frustratingly elusive goal. Those pesky little air pockets seem to appear out of nowhere, ruining the smooth, polished finish you worked so hard for. But fear not, nail enthusiasts! This blog post will delve into the mysteries of nail polish bubbles, revealing their causes and sharing valuable tips on how to prevent them. The Culprits Behind the Bubbles Several factors can contribute to the formation of bubbles in your nail polish. Here are the key culprits: Prevention is Key: Tips for Bubble-Free Manicures Now that you know the enemy, it’s time to learn how to fight it. Here are some effective strategies to prevent nail polish bubbles: Prepping Your Nails: Polishing Techniques: Additional Tips: Read Also: Avoiding Nail Polish Bubbles Step Description Prep your nails Cleanse, push back cuticles, and apply a base coat. Roll the polish bottle Avoid shaking to prevent air bubbles. Apply thin coats Two thin coats are better than one thick coat. Use a light touch Don’t press down too hard with the brush. Let each coat dry completely Allow ample drying time between coats. Store polishes in a cool, dry place Avoid direct sunlight and heat. Thin out thick polish Use a nail polish thinner for easier application. Clean up mistakes immediately Remove bubbles with a cotton swab dipped in acetone. FAQs Can I fix nail polish bubbles? Unfortunately, once bubbles appear, there’s no way to fix them without removing the polish and starting over. How long should I wait between coats of nail polish? Ideally, you should wait at least 3-5 minutes between coats to ensure each one dries completely. What is the best way to remove nail polish bubbles? The best way to remove nail polish bubbles is to gently pop them with a toothpick or fine needle before they dry. How often should I clean my nail polish brushes? You should clean your nail polish brushes with acetone or brush cleaner after each use to prevent them from becoming clogged and causing bubbles. Conclusion: By following these tips and tricks, you can say goodbye to nail polish bubbles and achieve flawless, professional-looking manicures at home. Remember, patience and proper technique are key to a successful. So grab your favorite polishes, embrace the DIY spirit, and let your creativity shine through!

Why Your Nail Polish Keeps Peeling Off

Why Your Nail Polish Keeps Peeling Off?

Have you ever spent hours meticulously applying nail polish only to find it peeling off in a matter of days? It’s frustrating, to say the least. The good news is, there are several reasons why your nail polish might be peeling, and once you identify the culprit, you can take steps to prevent it from happening again. Reasons Why Your Nail Polish Peeling Off Here are some of the most common reasons why your nail polish might be peeling: 1. Improper Preparation: 2. Oily Nails: 3. Moisture: 4. Thin Layers: 5. Poor Quality Nail Polish: Tips to Prevent Peeling Nail Polish Here are some tips to help you prevent your nail polish from peeling: Read Also: FAQs: How long should I wait before applying polish after removing old polish? You should wait at least 5-10 minutes after removing old polish before applying new polish. This gives your nails time to dry completely. Can I use acetone to remove the tacky layer after curing gel polish? Yes, you can use acetone to remove the tacky layer after curing gel polish. However, it’s important to use a lint-free wipe and to be gentle, as acetone can dry out your nails. How often should I apply a top coat? You should apply a top coat every few days to help prevent chipping and peeling. What can I do if my nail polish starts to peel? If your nail polish starts to peel, you can try applying a fresh top coat. If the peeling is severe, you may need to remove the polish completely and start over. Conclusion By following these tips, you can help to prevent your nail polish from peeling and keep your nails looking beautiful. Remember, proper preparation and using high-quality products are key to achieving a long-lasting manicure. Here is a table summarizing the reasons why nail polish peels and solutions to prevent it: Reason Solution Improper preparation Clean your nails, push back your cuticles, and buff your nails. Oily nails Apply a base coat formulated for oily nails. Moisture Avoid getting your nails wet soon after applying polish and wear gloves when washing dishes or cleaning. Thin layers Apply thin, even layers of polish and allow each layer to dry completely. Poor quality nail polish Use

Does Hair Toner Burn More Than Bleach

Does Hair Toner Burn More Than Bleach?

Hair toner and bleach are both chemical treatments used to change the color of hair. However, they work in different ways and have different side effects. What is hair toner? Hair toner is a semi-permanent hair color that is used to neutralize unwanted tones in hair. It is often used after bleaching or highlighting to remove brassiness or yellow tones. Toner is also used to correct color mistakes or to add subtle highlights or lowlights. What is bleach? Bleach is a chemical that lightens the color of hair. It works by breaking down the melanin, which is the pigment that gives hair its color. Bleach can be used to achieve a variety of blonde shades, from light blonde to platinum blonde. Does hair toner burn more than bleach? Hair toner does not typically burn more than bleach. However, both treatments can cause scalp irritation, especially if they are left on for too long or if the scalp is sensitive. Here is a table that compares the side effects of hair toner and bleach: Side Effect Hair Toner Bleach Scalp irritation Yes Yes Dryness Yes Yes Breakage Yes Yes Chemical burns Possible More likely How to prevent scalp irritation from hair toner and bleach? There are a few things you can do to prevent scalp irritation from hair toner and bleach: Read Also: FAQs Can I use toner and bleach at the same time? It is not recommended to use toner and bleach at the same time. Bleach is a much stronger chemical than toner and can damage your hair if it is used too frequently. If you want to use both toner and bleach, it is best to wait at least two weeks between treatments. What should I do if my scalp burns after using toner or bleach? If your scalp burns after using toner or bleach, rinse the product out of your hair immediately with cool water. You can also apply a cold compress to your scalp to help reduce the inflammation. If the burning is severe, or if you have any other concerns, see a doctor. Conclusion Hair toner and bleach can both cause scalp irritation. However, there are a few things you can do to prevent this. By following the tips above, you can safely use toner and bleach to achieve your desired hair color.

How To Fix Under Eye Hollows Without Filler

How To Fix Under Eye Hollows Without Filler?

Sunken eyes and under-eye hollows can be a concern for many people as they age. These hollow areas can make you appear tired and older than you feel. While fillers are a common solution, there are several natural and non-invasive methods to improve the appearance of under-eye hollows. Causes of Under-Eye Hollows: Natural and Non-invasive Solutions: Additional Tips: Table of Effective Treatments: Treatment Benefits Drawbacks Eye creams Hydrate, plump, and brighten the skin May not be effective for everyone Facial exercises Tone and lift the muscles around the eyes Requires time and commitment Cold compresses Reduce inflammation and puffiness May not be a long-term solution Home remedies Soothe and hydrate the skin May not be as effective as other treatments Concealer Camouflage under-eye hollows Can be difficult to apply Read Also: FAQs: What is the best way to get rid of under-eye hollows? There is no one-size-fits-all answer to this question, as the best treatment for you will depend on the severity of your under-eye hollows and the underlying causes. However, a combination of natural and non-invasive methods may be the most effective approach. How long do I have to wait to see results from these treatments? The results of these treatments will vary depending on the individual. Some people may see results after a few weeks, while others may need to continue treatment for several months before seeing significant improvement. Are there any risks associated with these treatments? Most of the natural and non-invasive treatments mentioned in this article are safe for most people. However, it is always important to consult with a doctor or dermatologist before starting any new treatment, especially if you have any pre-existing medical conditions. Conclusion: While under-eye hollows can be a frustrating issue, there are several natural and non-invasive methods available to help improve their appearance. By combining these treatments with a healthy lifestyle, you can achieve a more youthful and refreshed look.

Can I Use a Top Coat as a Base Coat

Can I Use a Top Coat as a Base Coat?

For those seeking a flawless, long-lasting manicure, the question of whether top coat can be used as a substitute for base coat often arises. While both products are essential for a beautiful nail finish, they serve distinct roles and cannot be interchanged without compromising the quality and longevity of your manicure. Understanding the Differences: Base Coat vs. Top Coat Base Coat: Top Coat: Can You Use Top Coat as Base Coat? While technically possible, using top coat as a base coat is not recommended for several reasons: Reduced Adhesion: Top coats are not designed to adhere directly to the nail plate. Their primary function is to bond with the nail polish itself. Using top coat as a base will result in a weaker bond, increasing the likelihood of chipping and peeling. Lack of Protection: Base coats provide a barrier between your nails and the pigmented nail polish, preventing staining. Applying top coat directly to your nails will leave them vulnerable to discoloration. No Glossy Finish: The glossy finish associated with top coats is achieved through specific ingredients that are not present in sufficient quantities in base coats. Using top coat as a base will result in a duller finish. Reduced Durability: Top coats are formulated to be flexible and wear-resistant. Base coats, however, require a different formulation to provide a strong foundation for the nail polish. Using top coat as a base will compromise its durability, leading to a less long-lasting manicure. Should You Use a Two-in-One Base and Top Coat? While some brands offer products that claim to function as both a base and top coat, these often fall short of delivering the performance of dedicated products. They may not adhere as well or offer the same level of protection, resulting in a less than ideal manicure. Read Also: FAQs: What happens if I accidentally use top coat as a base coat? While not ideal, a single application is unlikely to cause significant damage. However, it may result in less chip resistance and a duller finish. For future manicures, ensure you use the correct products. Can I skip using a base coat altogether? While technically possible, skipping the base coat will significantly reduce your manicure’s durability. It can also leave your nails vulnerable to staining. How long should I wait between applying base coat and top coat? Allow the base coat to dry completely before applying the top coat. This usually takes around 2-3 minutes. What are some good base and top coat brands? Popular and reputable brands for base and top coats include OPI, Essie, Sally Hansen, and Orly. Can I use a gel top coat on regular nail polish? While some gel top coats are designed to be used with regular nail polish, it’s important to check the product label for specific instructions. Using a gel top coat on regular nail polish may not cure properly and lead to smudging. By understanding the essential differences between base coat and top coat and following proper application techniques, you can achieve a stunning and long-lasting manicure every time. The Bottom Line: Always Use the Correct Product For a flawless and long-lasting manicure, always use a dedicated base coat and top coat. This ensures your nail polish adheres properly, remains protected, and boasts a beautiful shine.

Look Younger at 40

Look Younger at 40: A Practical Guide

Turning 40 is a milestone birthday that often brings about new perspectives and a renewed focus on health and well-being. While aging is inevitable, there are many things you can do to feel and look your best at this vibrant stage of life. This guide will explore practical tips and strategies to help you to look younger and embrace your inner youth. Diet and Nutrition: Exercise and Fitness: Skin Care and Beauty: Lifestyle Habits: Additional Tips: Read Also: Table of Tips: Tip Benefit Eat a balanced diet Provides essential nutrients for optimal health and radiant skin Limit sugar intake Reduces inflammation and promotes healthy aging Stay hydrated Plumps and hydrates skin, minimizing the appearance of wrinkles Move your body regularly Improves circulation, boosts energy levels, and strengthens muscles Incorporate strength training Builds muscle mass, maintains a healthy metabolism, and promotes a toned physique Embrace yoga and pilates Promotes flexibility, strength, and mindfulness Develop a consistent skincare routine Cleanses, tones, and moisturizes skin, addressing specific concerns Don’t forget the sunscreen Protects skin from harmful UV rays Consider retinol Reduces wrinkles, improves skin texture, and boosts collagen production Get enough sleep Promotes overall well-being and mental health Manage stress Reduces stress-related aging Socialize and connect Contributes to meaningful relationships and boosts confidence Hydrate your hair Maintains healthy and vibrant hair Brighten your smile Enhances your smile and boosts confidence Embrace a positive attitude Improves overall well-being and appearance Find your signature style Boosts confidence and self-expression Don’t be afraid to experiment Keeps you feeling young and engaged in life Faqs: Is it possible to reverse the signs of aging in my 40s? While you can’t stop the aging process, there are effective ways to minimize its visible effects. Adopting a healthy lifestyle, maintaining a balanced diet, and following a proper skincare routine can significantly slow down the aging process. How important is a balanced diet in maintaining a youthful appearance? A balanced diet plays a crucial role in preserving a youthful appearance. Nutrient-rich foods, including healthy fats, grains, lean proteins, fruits, and vegetables, provide essential vitamins and minerals that contribute to radiant skin, hair, and overall well-being. Can regular massages help reduce stress and make me look younger? Yes, regular massages can help alleviate stress, which, in turn, can positively impact your physical appearance. Stress reduction is linked to improved skin health and a more youthful glow. Are there specific hairstyles that can make me look younger in my 40s? Choosing a hairstyle that suits your face shape and complements your features can take years off your appearance. Consider shorter hairstyles, fringes, or bangs to add a youthful touch. How can eyeglasses impact my perceived age, and should I consider contact lenses? Thick-lensed eyeglasses are sometimes associated with an older appearance. If you experience vision issues, consider consulting with your optometrist about multifocal contact lenses, which can provide clear vision without the age-associated stigma of eyeglasses. Is it necessary to replace my wardrobe to look younger at 40? While a complete wardrobe overhaul isn’t essential, choosing fitted and flattering clothing can instantly make you look more youthful. Opt for pieces that enhance your body shape and make you feel confident. Conclusion: Turning 40 is a remarkable milestone that invites positive changes in lifestyle and self-care to promote a youthful and vibrant appearance. While the aging process is inevitable, the tips and strategies outlined in this guide provide practical and achievable ways to feel and look your best.