What Does Primer Do for Makeup

What Does Primer Do for Makeup?

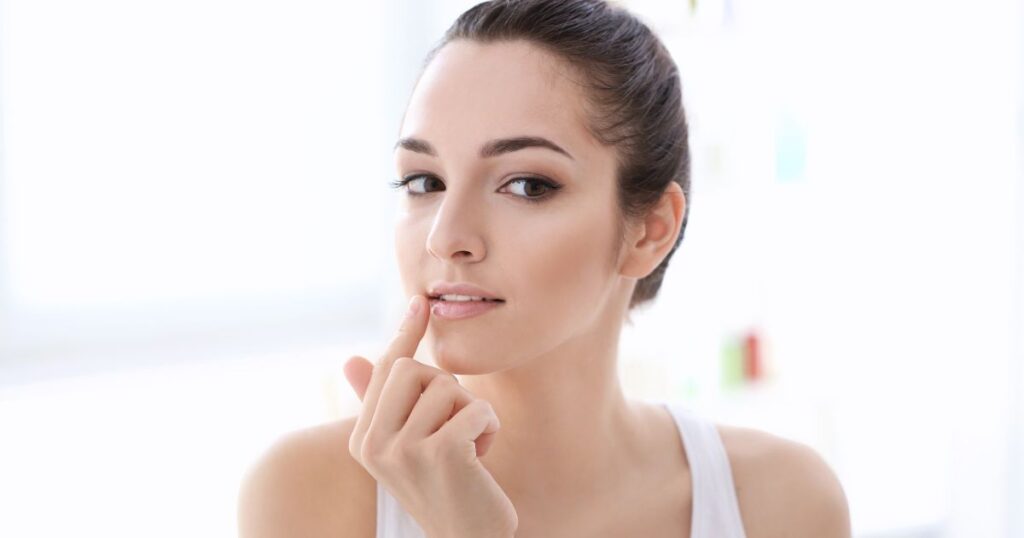
Makeup enthusiasts often find themselves navigating a maze of product terminology, especially when it comes to foundation primers. This essential component of a makeup routine is often overlooked or misunderstood. In this article, we will delve into the difference between foundation and primer, explore the various types of face primers, understand their benefits, and highlight the key ingredients to look for or avoid. Whether you are a makeup novice or an experienced beauty aficionado, this guide aims to demystify the world of makeup primers. Foundation vs. Primer: Foundation and primer are integral parts of the makeup process, applied before other color cosmetics. While both contribute to achieving a smoother, more even skin tone, they serve distinct purposes. Foundation: Foundation is a colored product designed to cover and conceal imperfections on the skin. Its primary role is to even out the skin tone by addressing areas of redness, irritation, or dark spots. Concealer, a related product, offers heavier coverage than foundation and is used to cover blemishes. Primer: Primer is applied before foundation, acting as a base after the skincare routine. Unlike foundation, primers are clear and slippery, resembling a serum. Their purpose is to smooth the skin, fill in lines and wrinkles, and create a less porous surface for makeup application. While not intended to correct color or even out the skin tone, primers make the subsequent makeup application easier and more effective. What Does Foundation Primer Do? A foundation primer serves as a shield on the skin, preventing makeup products from being fully absorbed. This not only enhances the longevity of makeup but also blurs pores, making them appear virtually invisible. A primer can fill in wrinkles and create a smooth canvas for makeup, ensuring a flawless finish. Types of Face Primers: Face primers have evolved beyond their initial canvas-creating abilities. Today, there are various types catering to specific skin concerns: Choosing the Right Primer: Selecting a primer depends on individual skin needs. Consider options like color-correcting for specific issues or anti-aging for added benefits. Opt for a natural, plant-based primer that hydrates and conditions the skin. Ingredients to Look For: Look for living ingredients in primers to ensure safety and efficacy: Ingredients to Avoid: Certain ingredients commonly found in facial primers can be harmful. Avoid alcohol, silicone, lanolin, stearic acid, nanoparticles, and synthetic fragrance, as they may lead to skin issues. How to Apply Foundation Primer? Apply primer after your skincare routine, allowing it to create a barrier between the skin and makeup. Use a small amount, as most primers are concentrated. Allow the primer to dry fully before proceeding with foundation and concealer application. Avoid over-applying, as it can lead to clogged pores and a heavy makeup feel. Common Primer Mistakes to Avoid: To maximize the benefits of a primer, avoid mixing synthetic and natural ingredients in your skincare routine. Ensure the primer dries fully before applying makeup and consider your skin type when selecting a primer. Always check compatibility between primer and foundation formulas and refrain from using multiple primers simultaneously. Read Also: How Long Do Silk Wrap Nails Last? Conclusion: Makeup foundation primers play a crucial role in achieving a flawless makeup look. By understanding their purpose, types, and ingredients, you can choose the right primer for your skin’s needs. Embrace the less-is-more philosophy, prioritize living ingredients, and follow proper application techniques to make the most of your primer. With this guide, you can navigate the world of makeup primers confidently, ensuring a smooth and radiant complexion.

Silk Wrap Nails vs Dip Powder

Silk Wrap Nails vs Dip Powder: Unveiling the Perfect Nail Style

When it comes to enhancing the beauty of our nails, the choice between silk wrap nails and dip powder nails has become a topic of discussion. If you’re unsure which style suits you best, fear not! This comprehensive guide will dissect the nuances, advantages, and drawbacks of silk wrap nails versus dip powder nails. By the end, you’ll have the clarity needed to make the right decision for your perfect set of nails. Understanding the Difference: Silk wrap nails utilize silk fabric, while dip powder nails are crafted from acrylic powder, a hardened plastic polymer. Dip powder nails are renowned for their strength and durability, offering a more extensive color palette compared to silk wraps. Application Time: Silk Wrap vs Dip Powder: Professionals can complete a full set of either silk wraps or dip powder nails in less than an hour. However, when considering at-home application, silk wraps are often quicker for beginners, taking approximately 60-90 minutes initially. Mastering at Home: Ease of Application: Silk wrap nails take the lead in terms of ease of application at home. They are considered the simplest for beginners, requiring basic skills. Dip powder nails, while slightly more challenging, become more manageable with practice. Longevity: How Long Do They Last?: Dip powder nails outshine silk wraps in terms of durability, lasting up to 12-14 days between refills, while silk wraps may require a refill every two weeks. The Cost Factor: In salons, silk wrap nails are marginally more expensive than dip powder nails. However, for at-home applications, both are budget-friendly, with kits available at various price points. Strength and Durability: Dip powder nails emerge as the stronger and more durable option, making them suitable for individuals with an active lifestyle. Silk wraps, while durable, may be more prone to bending or breaking under pressure. Aesthetic Appeal: What Do They Look Like? Dip powder nails tend to be thicker, offering strength but potentially appearing more artificial. Silk wraps are designed for a natural, elegant look, providing the option for nail polish application. Minimizing Damage: The Aftermath: Silk wraps are known for being gentler on natural nails, being more flexible and breathable. In contrast, dip powder nails may require acetone for removal, potentially causing dryness and weakening of natural nails. Taking Breaks: How Often Should You?: Silk wraps are less damaging, allowing for breaks every six months. Dip powder nails, being more robust, may require removal every 2-3 months, depending on natural nail health. Pros and Cons: Silk Wrap Nails: Pros: Cons: Pros and Cons: Dip Powder Nails: Pros: Cons: Read Also: How to Get Rid of Nail Growth Under Acrylics? FAQs: How do I know if silk wrap nails are right for me? Silk wrap nails are ideal for those seeking a natural look or wanting to maintain the health of their natural nails. Do I need to take a break from wearing silk wraps? No, you can wear silk wraps regularly without damaging your natural nails. Consider a break every 3 to 6 months if using hard gel with silk wraps. Can I remove silk wrap nails myself? Yes, silk wraps can be easily removed at home without harsh chemicals or acetone. How long do silk wrap nails last? Silk wrap nails typically last two weeks before needing refilling. How long do silk wrap nails last compared to dip powder nails? Dip powder nails last an extra week on average compared to silk wraps. What’s the difference between silk wrap nails and regular nail wraps? Silk wraps are made of real silk fabric, while regular wraps are made of fiberglass. Can I get silk wrap nails done at a salon? Yes, some professional nail salons offer silk wrap nails. How difficult are dip powder nails to remove? Dip powder nails are more challenging to remove than silk wraps and require the use of acetone. What’s the best way to remove dip powder nails? Cut and file them down, soak your nails in acetone for 10 minutes, and gently push away the top layer with a cuticle pusher. Repeat if necessary. How often should I get my nails done if I have silk wrap nails? Get an infill every 2 weeks and a completely new set after 6 weeks. Conclusion: Silk wrap nails are less damaging but may not last as long and are slightly more expensive. Dip powder nails offer longevity and a variety of colors but can appear artificial. The choice between the two depends on personal preference and lifestyle.

How Long Do Silk Wrap Nails Last

How Long Do Silk Wrap Nails Last?

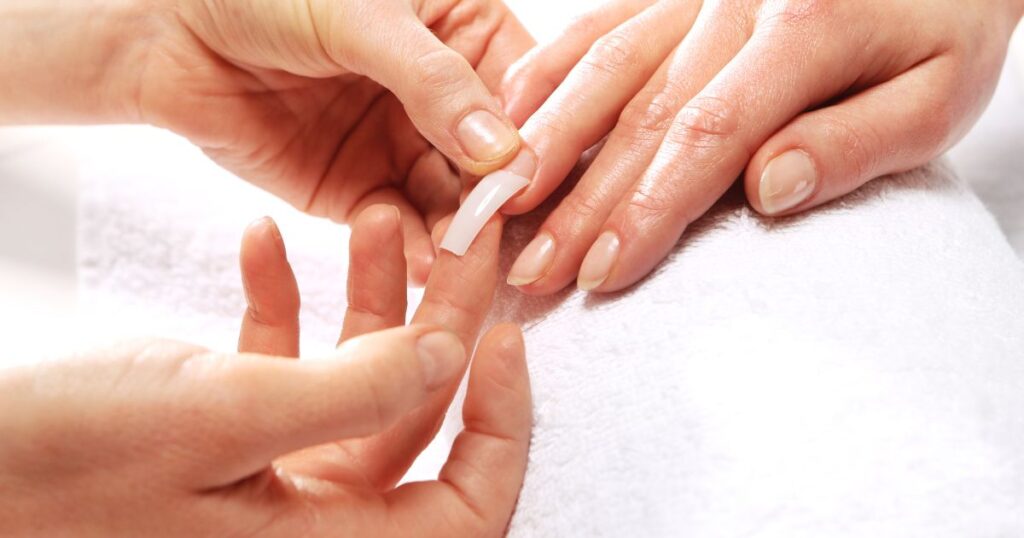
Embarking on a journey to enhance your nails can be an exciting self-care endeavor. Amidst the myriad of nail treatments, silk wrap nails emerge as a unique and rejuvenating option, offering strength and durability to natural nails while maintaining their length. In this blog post, we delve into the intricacies of silk wrap nails, exploring their application, benefits, and how they compare to other popular nail enhancements. What Are Silk Wrap Nails? Silk-wrap nails serve as a specialized enhancement for natural nails, providing strength and resilience without resorting to acrylic powders. Unlike extensions like Gel-X or acrylics, silk wraps are applied primarily for repairing specific nails, saving you from the need to trim broken or torn nails. This technique involves the application of a silk fabric using a peel-and-stick weave, which is then reinforced with resin or nail glue, resulting in transparent and hardened protection. How Is Silk Wrapping Applied? The process of silk wrapping is relatively straightforward. After applying the silk fabric and securing it with resin or nail glue, the nail is buffed and filed to achieve a smooth surface. This is followed by standard nail painting. The simplicity of the process contributes to the popularity of silk wraps. How Long Do Silk Wrap Nails Last? The longevity of silk-wrap nails varies based on lifestyle and growth patterns. On average, these manicures can last between a week and a half to three weeks. Designed for active lengths, their durability makes them a practical choice for individuals seeking to strengthen their natural nails without compromising on style. Benefits of Silk Wrap Nails: Silk wraps offer several advantages, making them an appealing option for nail enthusiasts: Disadvantages of Silk Wrap Nails: While silk wraps boast numerous benefits, there are a few drawbacks to consider: Silk-Wrap Nails vs. Other Nail Enhancements: How Are Silk Nail Wraps Applied? For those intrigued by the idea of silk-wrap nails, applying them at home is feasible. The process involves trimming and buffing nails, applying adhesive, attaching silk wraps, cutting excess fabric, and sealing with a top coat. The simplicity of the process makes it accessible even for manicure beginners. How Are Silk Nail Wraps Removed? Removing silk wraps involves using an acetone-based nail polish remover and cotton balls. The wraps can be easily slid off after a few minutes, eliminating the need for lengthy soaking or scraping. This gentle removal process minimizes damage to natural nails. How Do I Care for My Silk-Wrap Nails? Caring for silk-wrap nails involves adopting habits to prolong their lifespan: Read Also: How to Get Rid of Nail Growth Under Acrylics? FAQs: Are silk nail wraps reusable?  No, silk wraps are not reusable; they require infills every two weeks until a new set is needed. What is the difference between silk and fiberglass nail wraps?  While both provide reinforcement, silk wraps use pre-cut silk fabric, whereas fiberglass wraps use fine strands. Fiberglass wraps are thicker and more durable, while silk wraps have a lighter feel. Conclusion: Silk-wrap nails emerge as a versatile and gentle option for those seeking a balance between aesthetics and nail health. Despite a few limitations, their unique benefits make them a worthy addition to the realm of nail enhancements. Whether you’re a seasoned nail enthusiast or a newcomer to manicure adventures, silk wraps offer a bridge between durability and natural elegance. Consider incorporating them into your nail care routine for a lasting and stylish result.

How to Get Rid of Nail Growth Under Acrylics

How to Get Rid of Nail Growth Under Acrylics?

Acrylic nails are a fantastic way to achieve long, beautiful nails, but dealing with nail growth underneath can be a challenge. Not only is it annoying, but it can also lead to hygiene concerns and impact the overall health of your nails. In this comprehensive guide, we’ll explore effective methods to address and remove natural nail growth under acrylics, ensuring your nails remain seamless and beautiful. Let’s dive in! Smooth Out Nail Growth with a Carbide Bit The fastest and most efficient way to deal with nail growth under acrylics is to smooth it out using a carbide cone drill bit. This method involves shaving down the natural nail and thinning it out, creating a seamless transition between the natural and acrylic nails. How to Use a Carbide Nail Drill Bit: Remember, it’s crucial to be careful around the hyponychium and onychodermal band, which are essential parts supporting the nail bed. Remove Natural Nail Growth with a Needle Bit An alternative method is using a needle bit for precision work, especially in tight spaces underneath the nail. How to Use a Needle Bit: While a needle bit is effective, it may not be as suitable for significant growth compared to a carbide cone drill bit. Can You Cut Real Nails Under Acrylics? It’s not recommended to cut real nails under acrylics with scissors or clippers, as this may damage both the natural nail and the acrylic. Instead, opt for a nail drill or e-file with a needle or carbide drill bit for a safer and more effective approach. If you’re new to this process, seeking the assistance of a professional nail technician is advisable. How to Remove Real Nails from Under Acrylic? When dealing with nail growth under acrylics, the emphasis should be on smoothing rather than cutting. Using a carbide cone drill bit or a needle bit allows you to shave down and thin out natural nail growth, creating a smooth transition between the natural and artificial nails. Tips To Keep Grown-out Natural Nails and Acrylic Healthy Acrylic nails, like natural nails, can accumulate dirt. Here are some tips to keep them healthy: Read Also: Why Your Nail Polish Keeps Peeling Off? FAQs: Do Your Own Nails Grow Under Acrylic? Yes, acrylics are applied to the natural nail, and as your natural nails grow, they can push the acrylics further away from the nail bed, creating a visible gap or lip. How Fast Do Nails Grow Under Acrylics? The growth rate varies but averages around 3-4 millimeters per month. Maintaining good nail hygiene is crucial to prevent infections. Conclusion Dealing with natural nail growth under acrylics requires care, precision, and the right tools. By following the techniques outlined in this comprehensive guide, you can maintain beautiful, healthy acrylic nails. Remember to prioritize nail health, take breaks to let your nails breathe, and follow proper hygiene practices. With regular maintenance, you can enjoy stunning acrylic nails without sacrificing nail health.

How to Get Rid of Chest Wrinkles

How to Get Rid of Chest Wrinkles: A Comprehensive Guide

Chest wrinkles, often referred to as décolletage or cleavage wrinkles, can be a cause of concern for many individuals. Factors such as aging, sun exposure, sleeping positions, and lifestyle habits contribute to the development of fine lines and creases on the chest. In this comprehensive guide, we will explore the common causes of chest wrinkles, effective methods to remove them, and lifestyle habits to prevent their reappearance. Causes of Chest Wrinkles Aging As we age, the natural process of collagen and elastin production slows down, leading to a loss of skin elasticity and the appearance of wrinkles. Sun Exposure Excessive exposure to UV rays from the sun or tanning beds accelerates premature aging, causing fine lines, dark spots, and wrinkles on the chest. Sleeping Positions Sleeping on the side or stomach causes friction and compression of the skin, contributing to the formation of wrinkles. Smoking and Poor Lifestyle Choices Smoking accelerates collagen and elastin breakdown, while poor lifestyle habits like inadequate sleep and dehydration negatively impact skin suppleness. Genetics and Environmental Factors Genetics play a significant role in determining when wrinkles appear, and various environmental factors can speed up the aging process. Weight Fluctuations and Pregnancy Rapid weight gain or loss can stretch and sag the skin, contributing to the development of chest wrinkles. Pregnancy, in particular, leads to skin stretching. Lack of Regular Skincare Routine Neglecting to moisturize and care for the chest skin can result in dryness and the appearance of wrinkles. How to Get Rid of Chest Wrinkles: 9 Methods Topical Treatments Use daily applications of moisturizing and anti-aging products on cleansed skin, particularly before bedtime. Enzymes in exfoliants can remove dead skin cells, promoting healthy, wrinkle-free skin. Targeted Exercise Engage in specific exercises like pushups or yoga to improve skin elasticity and volume. Regular exercise enhances circulation, rejuvenating and nourishing the skin. Laser Resurfacing Highly effective in erasing wrinkles, laser resurfacing stimulates skin cell regeneration, resulting in healthy, smooth, and bright skin. Hormone Replacement Therapy For menopausal individuals experiencing severe wrinkles, hormone replacement therapy aids in collagen production, positively impacting skin texture and elasticity. Botox or Dermal Fillers Injectables like Botox freeze muscles causing dynamic wrinkles, while dermal fillers restore lost collagen, adding volume to the skin. Microneedling Minimally invasive microneedling stimulates collagen production, improving skin texture and reducing wrinkles on the chest. Chemical Peels Chemical peels effectively reduce chest wrinkles by promoting skin renewal and collagen production. Fat Transfers Fat transfers involve transferring fat to add volume, addressing chest wrinkles and providing natural, lasting results. Silicone Décolleté Pads Medical-grade silicone pads worn on the chest create a seal, trapping moisture and preventing the formation of wrinkles. How to Prevent Chest Wrinkles? Apply Sunscreen Wear and reapply sunscreen, even on cloudy days, to protect the thin and sensitive skin on the chest from UV damage. Cover Your Chest in the Sun Protect your chest from direct sunlight with clothing or accessories, minimizing the risk of sunburn and wrinkles. Avoid Scrunching Your Chest Choose well-fitting undergarments and avoid constricting bras and sleeping positions that can cause skin folding. Exercise Regularly Engage in targeted exercises like yoga and pushups to maintain soft and supple chest skin. Quit Bad Habits Quit smoking and reduce alcohol intake to prevent collagen breakdown, nutrient depletion, and skin inflammation. Watch Your Diet Maintain a balanced diet rich in nutrients, amino acids, and antioxidants to preserve youthful skin. Stay Hydrated Drink at least 8 glasses of water daily, increasing the amount during exercise or in hot conditions. Adopt a Proper Skincare Routine Extend your skincare routine to include the chest, with regular moisturizing and exfoliating to reveal youthful skin. Chest Wrinkles: Insights from Dermatologists Décolletage and Signs of Aging Dermatologists emphasize the importance of addressing chest wrinkles and offer various treatments for effective results. Read Also: Unveiling the Power of Skill-Related Fitness FAQs: Can chest wrinkles be completely eliminated? While complete elimination may not be possible, various treatments and preventative measures can significantly reduce the appearance of chest wrinkles. How often should I apply sunscreen to my chest? Sunscreen should be applied every couple of hours, especially during prolonged sun exposure. Even on cloudy days, UV rays can penetrate and cause skin damage. Are there any side effects of using silicone décolleté pads? Silicone pads are generally safe, but individuals with sensitive skin should perform a patch test. They aim to prevent and reduce wrinkles by maintaining optimal skin hydration. Conclusion: Chest wrinkles can be effectively managed and prevented through a combination of skincare routines, lifestyle adjustments, and professional treatments. By understanding the causes and adopting proactive measures, individuals can maintain smooth and youthful-looking décolletage. Explore the recommended methods, incorporate them into your routine, and consult with dermatologists for personalized guidance on achieving and maintaining healthy skin. Remember, your chest and neck should be as much of a focus in your skincare routine as your face. Start by cleansing and exfoliating your décolletage regularly and wearing sunscreen on this area of your body to prevent premature signs of aging. Before implementing a regimen, however, consult with a qualified dermatologist to ensure the products you use are a match for your skin type.

Unveiling the Power of Skill-Related Fitness

Unveiling the Power of Skill-Related Fitness: A Comprehensive Guide

In the realm of physical fitness, the focus often centers around health-related components, but there’s a crucial aspect that deserves equal attention—skill-related fitness. This article delves into the six key components of skill-related fitness, emphasizing their importance and providing practical insights on how to incorporate them into physical education classes. Understanding Skill-Related Fitness: Physical fitness, as defined in a 2019 comparative study, encompasses the capacity to perform daily activities with vitality and sharpness. While health-related fitness components focus on cardiovascular fitness, muscular strength, flexibility, and body composition, skill-related fitness components hone in on the motor potential required for activities involving speed, agility, power, balance, coordination, and reaction time. The Six Skill-Related Components of Fitness: 1. Agility: Agility is the ability to rapidly change the direction of the whole body while maintaining balance. Activities like basketball, volleyball, and agility drills such as shuttle runs can significantly enhance agility. 2. Balance: Balance involves maintaining equilibrium while stationary or in motion. Yoga, gymnastics, and sports like football and basketball contribute to improving both static and dynamic balance. 3. Coordination: Coordination is the skillful execution of movements using the senses and various body parts. Activities such as biking, swimming, and games like tennis and juggling aid in developing coordination. 4. Power: Power is the ability to perform tasks quickly and forcefully, combining strength and speed. Plyometrics, track and field, and sports like football and tennis are effective in building power. 5. Reaction Time: Reaction time is the ability to respond quickly to stimuli. Sprint starts, table tennis, badminton, and racquetball are activities that enhance reaction time. 6. Speed: Speed is the ability to move quickly from one point to another. Sprinting, bicycling, and rowing, along with interval training and strength exercises, contribute to improving speed. Incorporating Skill-Related Fitness Components in PE Classes: To successfully integrate skill-related fitness components into physical education classes, educators should: Physical Activity Examples for PE Classes: 1. Skill-Related Fitness Circuits: 2. Skill-Based Fitness Stations: 3. Large Group PE Games: 4. Skill-Based Task Cards: Importance of Skill-Related Fitness in Everyday Life: Skill-related fitness components contribute to improved motor skills and overall fitness. These components are easily incorporated into various activities, promoting a healthy fitness routine. Large group games offer a dynamic way to practice multiple skills, while skill-based task cards provide independent skill improvement. Read Also: How to Plump Your Lips Naturally? FAQs: What is the significance of agility in sports? Agility is crucial in sports as it enables rapid and accurate changes in direction, a key aspect in activities like soccer and tennis. How can balance be improved? Activities such as yoga and gymnastics, along with sports like football and basketball, contribute to enhancing both static and dynamic balance. Why is reaction time important in sports? Reaction time is essential in sports, as quick responses can make the difference between success and failure, as seen in soccer goalkeeping or baseball batting. Conclusion: Skill-related fitness components play a pivotal role in enhancing movement and motor skills, contributing to overall physical fitness. By incorporating these components into physical education classes through circuits, stations, games, and task cards, students can enjoy a diverse and engaging approach to improving their fitness levels. These activities not only align with educational standards but also foster a lifelong commitment to physical activity.

How to Plump Your Lips Naturally

How to Plump Your Lips Naturally: A Comprehensive Guide

How to Plump Your Lips Naturally? Full, plump lips are often associated with youth and beauty. While cosmetic procedures like Botox injections have gained popularity, there are natural and non-invasive methods to achieve the coveted fullness. In this comprehensive guide, we’ll explore various techniques, from skincare routines to makeup tips, to help you enhance the natural beauty of your lips. Understanding Lip Changes with Age: As we age, lips naturally lose volume, and factors like the deterioration of collagen and exposure to the sun contribute to the appearance of fine lines and wrinkles. Before diving into natural methods, it’s essential to understand the changes that occur with age. Non-Botox Cosmetic Treatments: 1. Lip Fillers: Lip fillers, using materials like hyaluronic acid, provide a safe and effective method for lip augmentation. The results are almost immediate, and they can last up to six months. We explore popular brands like Juvéderm, Restylane, and Belotero Balance. 2. Lip Implants: Unlike fillers, lip implants offer a permanent enhancement of the lips. The surgical procedure involves the insertion of soft plastic silicone or a fat transfer. We delve into the techniques and recovery process associated with lip implants. 3. Lip Threading: Lip threading is a newer method for cosmetic enhancement using dissolvable threads made of poly-L-lactic acid. We discuss the procedure, potential side effects, and the natural elevation it provides to the upper lip. 4. Lip Lift: A lip lift is an outpatient cosmetic procedure performed surgically to shorten the distance between the nose and mouth, creating an elevation that improves lip shape and fullness. We explore how it addresses sagging skin and its permanence. Natural Ways to Care for Your Lips: If you prefer non-invasive methods, there are natural ways to care for your lips and achieve a fuller pout. 1. Exfoliate Your Lips: Regular exfoliation removes dry and old skin, promoting youthfulness. DIY lip scrubs with ingredients like cinnamon, coconut oil, and honey are effective in eliminating flaky skin. 2. Invest in a Good Lip Plumper Product: Lip plumpers containing mild irritants like menthol, ginger, and capsicum increase blood flow, resulting in temporary fullness. Some products also include hyaluronic acid for smooth and moist lips. 3. Add Lip Liner to Your Makeup Routine: Using a lip liner can prevent smudging and create an illusion of fuller lips. Match the lip liner with your lipstick shade for a seamless blend. 4. Moisturize Your Lips: Topical serums rich in hyaluronic acid and ingredients like cocoa butter provide essential hydration, preventing chapping and cracking. Additionally, staying hydrated by drinking plenty of water is crucial. 5. Use Essential Oils: Peppermint oil, chamomile oil, lavender oil, and lemon oil are essential oils known for hydrating lips and restoring their natural glow. 6. Do Facial and Lip Exercises: Facial yoga exercises focused on the lips can minimize wrinkles and fine lines. Techniques include puckering lips, creating an “O” shape, and pulling and contracting mouth sides. Try Lip Enhancement Treatments at aNu Aesthetics: For those considering cosmetic lip injections, aNu Aesthetics offers a range of services, prioritizing safety and optimal results. Consultation with their experienced doctors can guide you toward achieving your desired goals. How to Get Naturally Plump Lips With Skincare: 1. Exfoliate Your Lips: Exfoliation is crucial for removing dead skin, allowing moisturizers to penetrate effectively. Products like Sara Happ Lip Scrub or DIY mixtures of oil and sugar can provide gentle exfoliation. 2. Apply a Hydrating Lip Mask: Deep condition your lips with hydrating masks like Kiehl’s Buttermask for Lips, containing coconut oil and mango butter. Some masks with pepper or chili pepper create a vasodilating effect for a temporary plumping effect. 3. Moisturize Your Lips Regularly: Lips require consistent moisturization for suppleness. Hydrating balms with nourishing oils, such as La Roche-Posay Cicaplast Lips Hydration Restore Lip Balm, are recommended. 4. Use a Product with Hyaluronic Acid: Products with hyaluronic acid maintain lip hydration and counteract volume loss. The Hydrating Lip Plumping Serum from the recommended products is enriched with 1% hyaluronic acid and tripeptide. 5. Try Contouring: Enhance lip shape with lip liners matching your lipstick. Illuminators on the cupid’s bow create shadows and highlights, giving the illusion of volume. 6. Plump Your Lips With Gymnastics: Facial exercises like forming the letter O and stretching lips can strengthen lip contours, preventing fine lines and increasing volume. 7. Use the Cold To Plump Up Your Lips: A two-minute lip massage with an ice cube boosts blood microcirculation, providing instant plumping. While the effect is not permanent, it refreshes the lips. How to Get Naturally Plump Lips With Makeup: 1. Exfoliate Your Lips: Light exfoliation before makeup application ensures a smooth canvas for lipstick and gloss. 2. Overline Your Lips With Pencil: Subtle overlining using a freshly sharpened or fine-tipped lip pencil enhances natural contours. Aggressive overlining may appear unnatural in person. 3. Apply a Lipstick: Choose glossy or satin finish lipsticks for fuller results. Matte lipsticks may accentuate dryness, so it’s advisable to opt for more hydrating options. 4. Finish With a Lip Gloss: Layering a plumping lip gloss, focusing on the highest points of the cupid’s bow, provides maximum fullness and shine. 5 (Optional): Contour Your Lips: For additional volume, contour your lips with a cool-toned product below the lower lip, creating a shadow effect. Read Also: Can I Wear Lipstick After Lip Filler? FAQs: Are natural lip enhancement methods as effective as cosmetic procedures like Botox or fillers? Natural methods may not provide instant, dramatic results like cosmetic procedures, but they offer a gradual and subtle enhancement. The effectiveness varies from person to person, and consistency is key for optimal results. Is it safe to perform lip threading or lip lifts for cosmetic enhancement? When performed by a trained professional, lip threading and lip lifts are generally safe procedures. However, like any cosmetic intervention, they may carry some risks and side effects. Consultation with a qualified practitioner is essential to understand individual suitability and potential outcomes. How long do the results of natural lip …

How to Plump Your Lips Naturally: A Comprehensive Guide Read More »

How to Get Soft Lips

How to Get Soft Lips: A Comprehensive Guide

How to get soft lips? Having soft, pink lips is a desire many share, yet often, lip care is neglected. In this guide, we’ll explore the best practices for achieving and maintaining irresistibly soft and pink lips. From daily routines to DIY remedies, let’s dive into the steps to ensure your lips are not just noticed but also well-nurtured. The Neglected Elegance of Lips Lips, being a prominent facial feature, can significantly enhance one’s visual attractiveness when they are soft, sensuous, and pink. Unfortunately, lip care is often an afterthought, and we only pay attention when issues like dryness and darkening arise. Achieving flawless lips requires a consistent and caring routine. How to Get Soft Lips in 10 Simple Steps: 1. Keep Your Lips Moist 2. Drink Water Throughout The Day 3. Choose A Lip Balm With SPF 4. Honey and Lemon Therapy 5. Wear The Right Lipstick 6. Make A Simple Lip Scrub 7. Moisturize and Tint Lips With Rose and Rose Water 8. Make A Homemade Lip Mask 9. Baking Soda Scrub 10. Exfoliate Your Lips With A Toothbrush Importance of Lip Hydration Lip hydration is crucial for maintaining youthful, wrinkle-free lips. Lips are exposed to external elements constantly, making them susceptible to dryness. Regular lip balm application helps combat the effects of severe weather conditions. The Most Effective Natural Lip Care Routine for Dry Lips To combat dry lips, a natural lip care regimen is essential. Hydration and exfoliation are the two pillars of an effective routine. Hydrate Your Lips Exfoliate 1–2 Times Per Week How to Get Soft Lips Naturally: The Basics Caring for your lips doesn’t have to be complicated. Follow these fundamental steps to achieve and maintain soft, pink lips naturally. 1. Exfoliate Your Lips 2. Consume Enough Water 3. Keep Your Chapstick at Hand 4. Apply Lip Balm Overnight 5. Re-apply Your Chapstick Regularly 6. Choose a Chapstick with SPF for Day Wear 7. Apply Lipstick the Right Way 8. Create a Moisture Sandwich for Your Lips 9. Prepare a Lip Mask 10. Avoid Bad Habits Read Also: Can You Get Lip Fillers at 17? FAQs: How to make lip scrub for pink lips at home? Discover DIY scrub recipes using natural ingredients for exfoliating and pigmentation reduction. How to make lips pink for men? Follow the same lip care tips for men, including scrubbing, moisturizing, sun protection, and avoiding bad habits. How to make black lips pink at home? Address hyperpigmentation with home remedies and lightening techniques for naturally pink lips. Conclusion Achieving soft, pink lips involves consistent care, hydration, and protection. By incorporating these tips and practices into your daily routine, you can enhance the natural beauty of your lips. Say goodbye to dryness and darkening, and hello to irresistibly soft, pink lips that are sure to boost your confidence and overall appearance. Remember, consistency is key in the journey to soft and luscious lips. Start your lip care routine today, and let your lips be the focal point of your radiant smile.

How to Get Lip Gloss Stains Out

How to Get Lip Gloss Stains Out: A Comprehensive Guide

Lip gloss is a beloved beauty product that adds a glossy finish to lips, but it can become a fashion nightmare when it finds its way onto your clothes. In this comprehensive guide, we’ll explore effective methods to remove lip gloss stains from various fabrics, whether dealing with a fresh spill or a set stain. These techniques will help you restore your clothes to their pristine condition, ensuring you can confidently wear your favorite lip gloss without worrying about stains. Quick Safety Tips: Before delving into the removal process, it’s crucial to consider safety precautions: Immediate Action for Lip Gloss Stains: 1. Ammonia Method: 2. Baking Soda Method: 3. Liquid Detergent Method: Lip Gloss Removal for Colorfast Clothes: 4. OxiClean Method: 5. White Vinegar Method: Lip Gloss Removal Over Time: 6. Rubbing Alcohol Method: How to Get Lip Gloss Out of Jeans: 7. Hairspray Method: Stubborn Stains and Additional Methods: 8. Shaving Cream Method: 9. WD40 Method: 10. All-Purpose Stain Remover: Preventive Measures and Tips: Read Also: Can I Wear Lipstick After Lip Filler? FAQs: Can I throw lip gloss-stained clothing directly into the washing machine? No, it’s crucial to pre-treat the stained area with detergent before washing. What if the stain persists after washing? Repeat the pre-treatment step or try a specialized lip gloss stain remover. How to prevent lip gloss stains on clothing? Use a lip brush, choose lip balm on windy days, and act quickly with stain removal methods. Conclusion: Lip gloss stains on clothes are a common beauty mishap, but with the right techniques, you can effectively remove them and keep your wardrobe looking pristine. From immediate actions to stubborn stain removal, these methods ensure your clothes stay lip gloss-free. Follow the tips, act promptly, and confidently rock your favorite lip gloss without fear of stains.

How Often Should You Use a Clay Face Mask

How Often Should You Use a Clay Face Mask?

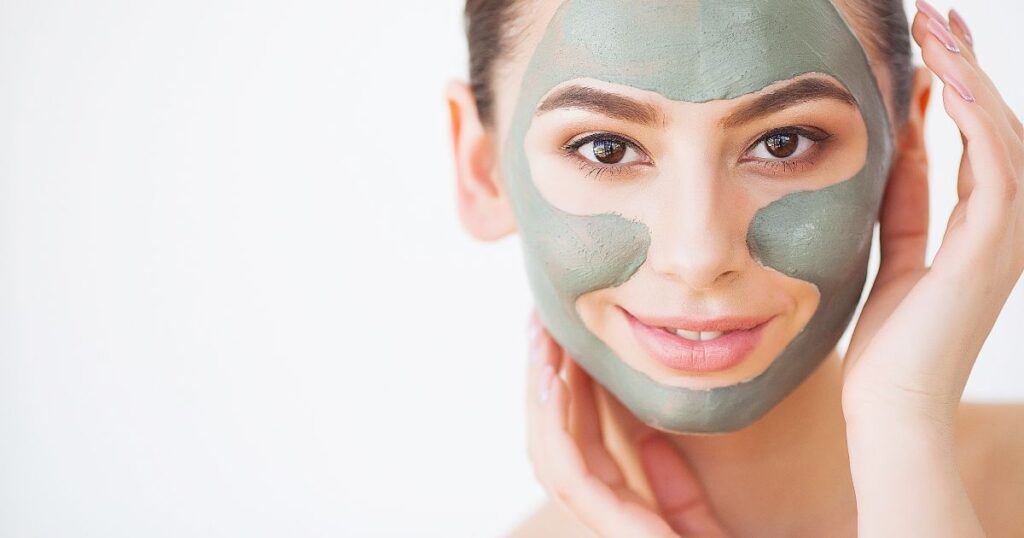
Clay face masks have become a staple in skincare routines, offering a myriad of benefits for various skin types. From combating acne to restoring natural glow, these masks are versatile. However, the key lies in using them judiciously to avoid adverse effects. In this comprehensive guide, we’ll delve into the optimal frequency of clay mask application based on skin types, formulations, and environmental factors. Understanding Clay Masks: The Basics Clay masks, rich in minerals, nourish the skin while removing excess oil. The absorption process delivers nutrients, leaving the skin soft, smooth, and radiant. However, using them daily is not advisable. Hydrating masks can be used more frequently, but clay masks should ideally be limited to 1-2 times a week to prevent dehydration and irritation. Three Phases of a Clay Mask: Important Tip: Never let a clay mask dry fully. Washing off during the semi-dry phase ensures maximum benefits without over-drying the skin. How Many Face Masks Can You Apply per Week? The frequency of face mask application depends on skin type: Different Types of Face Masks and Their Recommended Frequencies: Factors Affecting Frequency: Skin Type: Environmental Conditions: Adjust mask frequency based on weather and pollution levels. For example, increase hydrating masks in winter and use detoxifying masks more in polluted environments. Should You Use Peel-Off and Sheet Masks? Can You Mix and Match Face Masks? Recommended Sequence: Your Skin Is the Best Judge: While guidelines provide recommended frequencies, listen to your skin. It remains the best judge of what it needs. A conservative approach is advisable for masks with active ingredients. Read Also: How Long Do Face Masks Last Unopened? FAQs: Can I use a clay mask every day? It is not recommended. Ideally, 1-2 times a week is sufficient to avoid over-drying the skin. What if I have sensitive skin? Exercise caution and limit clay mask use to once a week to prevent irritation. Can I mix different types of face masks? Yes, multi-masking or using masks in sequence is effective for targeted skincare. How does environmental factors affect mask frequency? Adjust mask frequency based on weather and pollution levels; increase hydration in winter and detoxify in polluted environments. Is it okay to use an overnight mask every night? It can be used 2-3 times a week for most skin types; adjust based on individual needs. Conclusion: Understanding how often to use a clay face mask involves considering your skin type, the mask formulation, and environmental factors. Tailor your routine to meet your skin’s needs, and choose masks wisely to achieve clear, healthy skin. Remember, moderation is key for optimal skincare results. Recommended Frequency for Different Face Masks Face Mask Type Recommended Frequency Anti-Aging Masks 1-2 times a week Brightening Masks 1-2 times a week Charcoal Masks 1-2 times a week Clay Masks 1-2 times a week Exfoliating Masks 1-3 times a week Overnight Masks 2-3 times a week or more